Changing Needle

Again, i forgot to check my sewing needle. When I sew, seems like the tip is not sharp anymore so it damaged the fabric a little bit. Thank goodness, i had a chance to change it so it wouldn’t give damage any further.

Checking the tip of needle and then changing the needle when it’s not too sharp anymore is important

  1. it eases the sewing. Somehow, the fabric can pass the sewing feet easier if we use the correct and GOOD quality of sewing machine needle.
  2. it also prevent the fabric damage. Blunt needles can damage the fibre like pull it. It leaves the fabric with thin lines on the fabric. The lines are formed because of the fibres that supposed to be on that lines are broken or pulled or damaged. In extreme case, it can create ‘wrinkle’ on the fabric.

Even in case of we are using a very good quality of needle, checking is a must and changing can be necessary. Sometimes, a very good quality needle is not broken or seems still sharp but it is not. It’s hard to detect but we will know the nature of the needle after lots of sewing hours.

Rayon Fabric

I used rayon fabric on my new doll clothes. I made quite similar to 1/4 circle skirt. I saw the rayon fabric is also good for 1/4 BJD doll. The fall is better than even thin cotton. Cotton sometimes can be stiff. Rayon is less stiff. I might re-use it on bigger doll. I think, the drape will be looked better. Perhaps, I might try flounce project in the future using the same fabric for BJD scale.


Sewing Doll Clothes vs Sewing Human Clothes


I’ve been sewing both type for quite sometime. Specially for doll clothes, may be since late 2009. I realized that sewing techniques for each are different after sometime sewing doll clothes. Human Clothes seamstresses who never sew doll clothes may not understand the adjustment that the doll clothes seamstresses make as well as the difficulties besides the small size. They tend to comment it supposed to be like this and that or but sometimes they don’t really understand what they’re saying.

Doll clothes:

  1. The size make it hard to sew. So, lots of adjustment and off-good sewing-techniques are made to accommodate.
  2. The supplies are difficult. The scale sometimes is still a bit too big for the size of the doll. It makes the clothes look odd on doll. Finding the right scale supplies are not easy. Sometimes, once we find 1 supplies with right scale but another supplies are not with right scale. It can’t be used together. Here, we have to ‘let go’ what is said ‘supposed to’.
  3. The fabric types may add difficulty. Sometimes, we want to use chiffon or some ‘easy fraying’ fabrics. We have to cut the seam edge until very closed to the seam to make the clothes shape more smooth. YET, it risk the sewing itself. Very closed can’t be very closed. Don’t criticize until you experience it. Yes, there’s glue or kind of liquid to prevent fraying BUT it’s not always available in all countries. Yes, there are other technique like burning the edge or heating it with kind of hot-pen, but it may endanger the fabric itself and the quality of result can be varied. The fabric color can change (it can be happened with fraying prevent liquid, too) or it’s temporary (after washing the clothes, it goes back to fraying), and so on. Even if we want to cut with zigzag scissor, it’s not always helping. Sometimes, fraying is fraying. The only way to lock it is with french seam which not always applicable for doll clothes.
  4. We can’t choose whatever fabric we want to. The options are narrowing and not all right fabrics are available in ALL countries. I saw some doll clothes are really good in showing how it flows on the doll body like when human wearing chiffon. I don’t know what kind of fabrics are they. Are they silk? what kind of silk? Are they chiffon? what kind of chiffon? Something like that.  Sometimes we want to create something with this or that impression but we can’t do it 100% right because no fabrics for that in the country. Even if we have to import or want to import, we don’t know what it’s name in other countries.
  5. Finishing for doll clothes and human clothes aren’t always the same either. At least, I don’t do that. I do different things for human and doll clothes finishing.

Sewing human clothes with good and right techniques can be helpful to understand how the clothes should be looked. Then, we apply it to doll scale.

About neatness.

It can be pursued. It is still a must. Even for doll scale, neatness can be pursued. Even after adjustment and those difficulties, neatness can be pursued. Not because doll clothes are difficult, so the neatness is adjust too. Not like that either.

Project for myself: Unprofessionally Finishing


I’m going to show you about the project i made for myself which I made not as professional as if I made it for sale.

I want to write about this as I’ve been a bit ‘tickled’ since I saw a doll clothes product which is finished in unprofessional way (this is my opinion. I have my own standard about it). It’s ok for me to see the seam edge cut with zig zag scissor to prevent from fraying or may be just leave it as long as the cutting is alright and seal with special glue. Yet, in my opinion, i don’t know what this person means by sewing zigzag on the edge. The zigzag is also wide  and not really protecting the edge. So, it was there but with no function at all. I don’t know. And it makes the sewing looks a mess. Perhaps for other kind of projects, it’s ok, but as for dolly project, I don’t know. That handmade is sold. The buyer told me she bought a lot from the seller and the total amount is pretty huge for me. I wonder, if the seller has this kind of ‘professionalism’ inside. Even the buyer said,”even I (actually) can sew it neater.” The buyer just wanted to help the seller so then bought lots from the seller.

The clothes, any clothes, any projects I made for sale is pretty different from ones for myself. Ones for myself as a level of professionalism degree lower than I’m going to sell. I’m pretty cautious when it comes to product quality. I’m not saying my sewing is flawless but I wont just sew recklessly and without thinking. I won’t sell anything like that the buyer show me (not only one buyer). It’s scary to receive money for something I don’t do from the heart and mind. There’s responsibility regarding to the money.

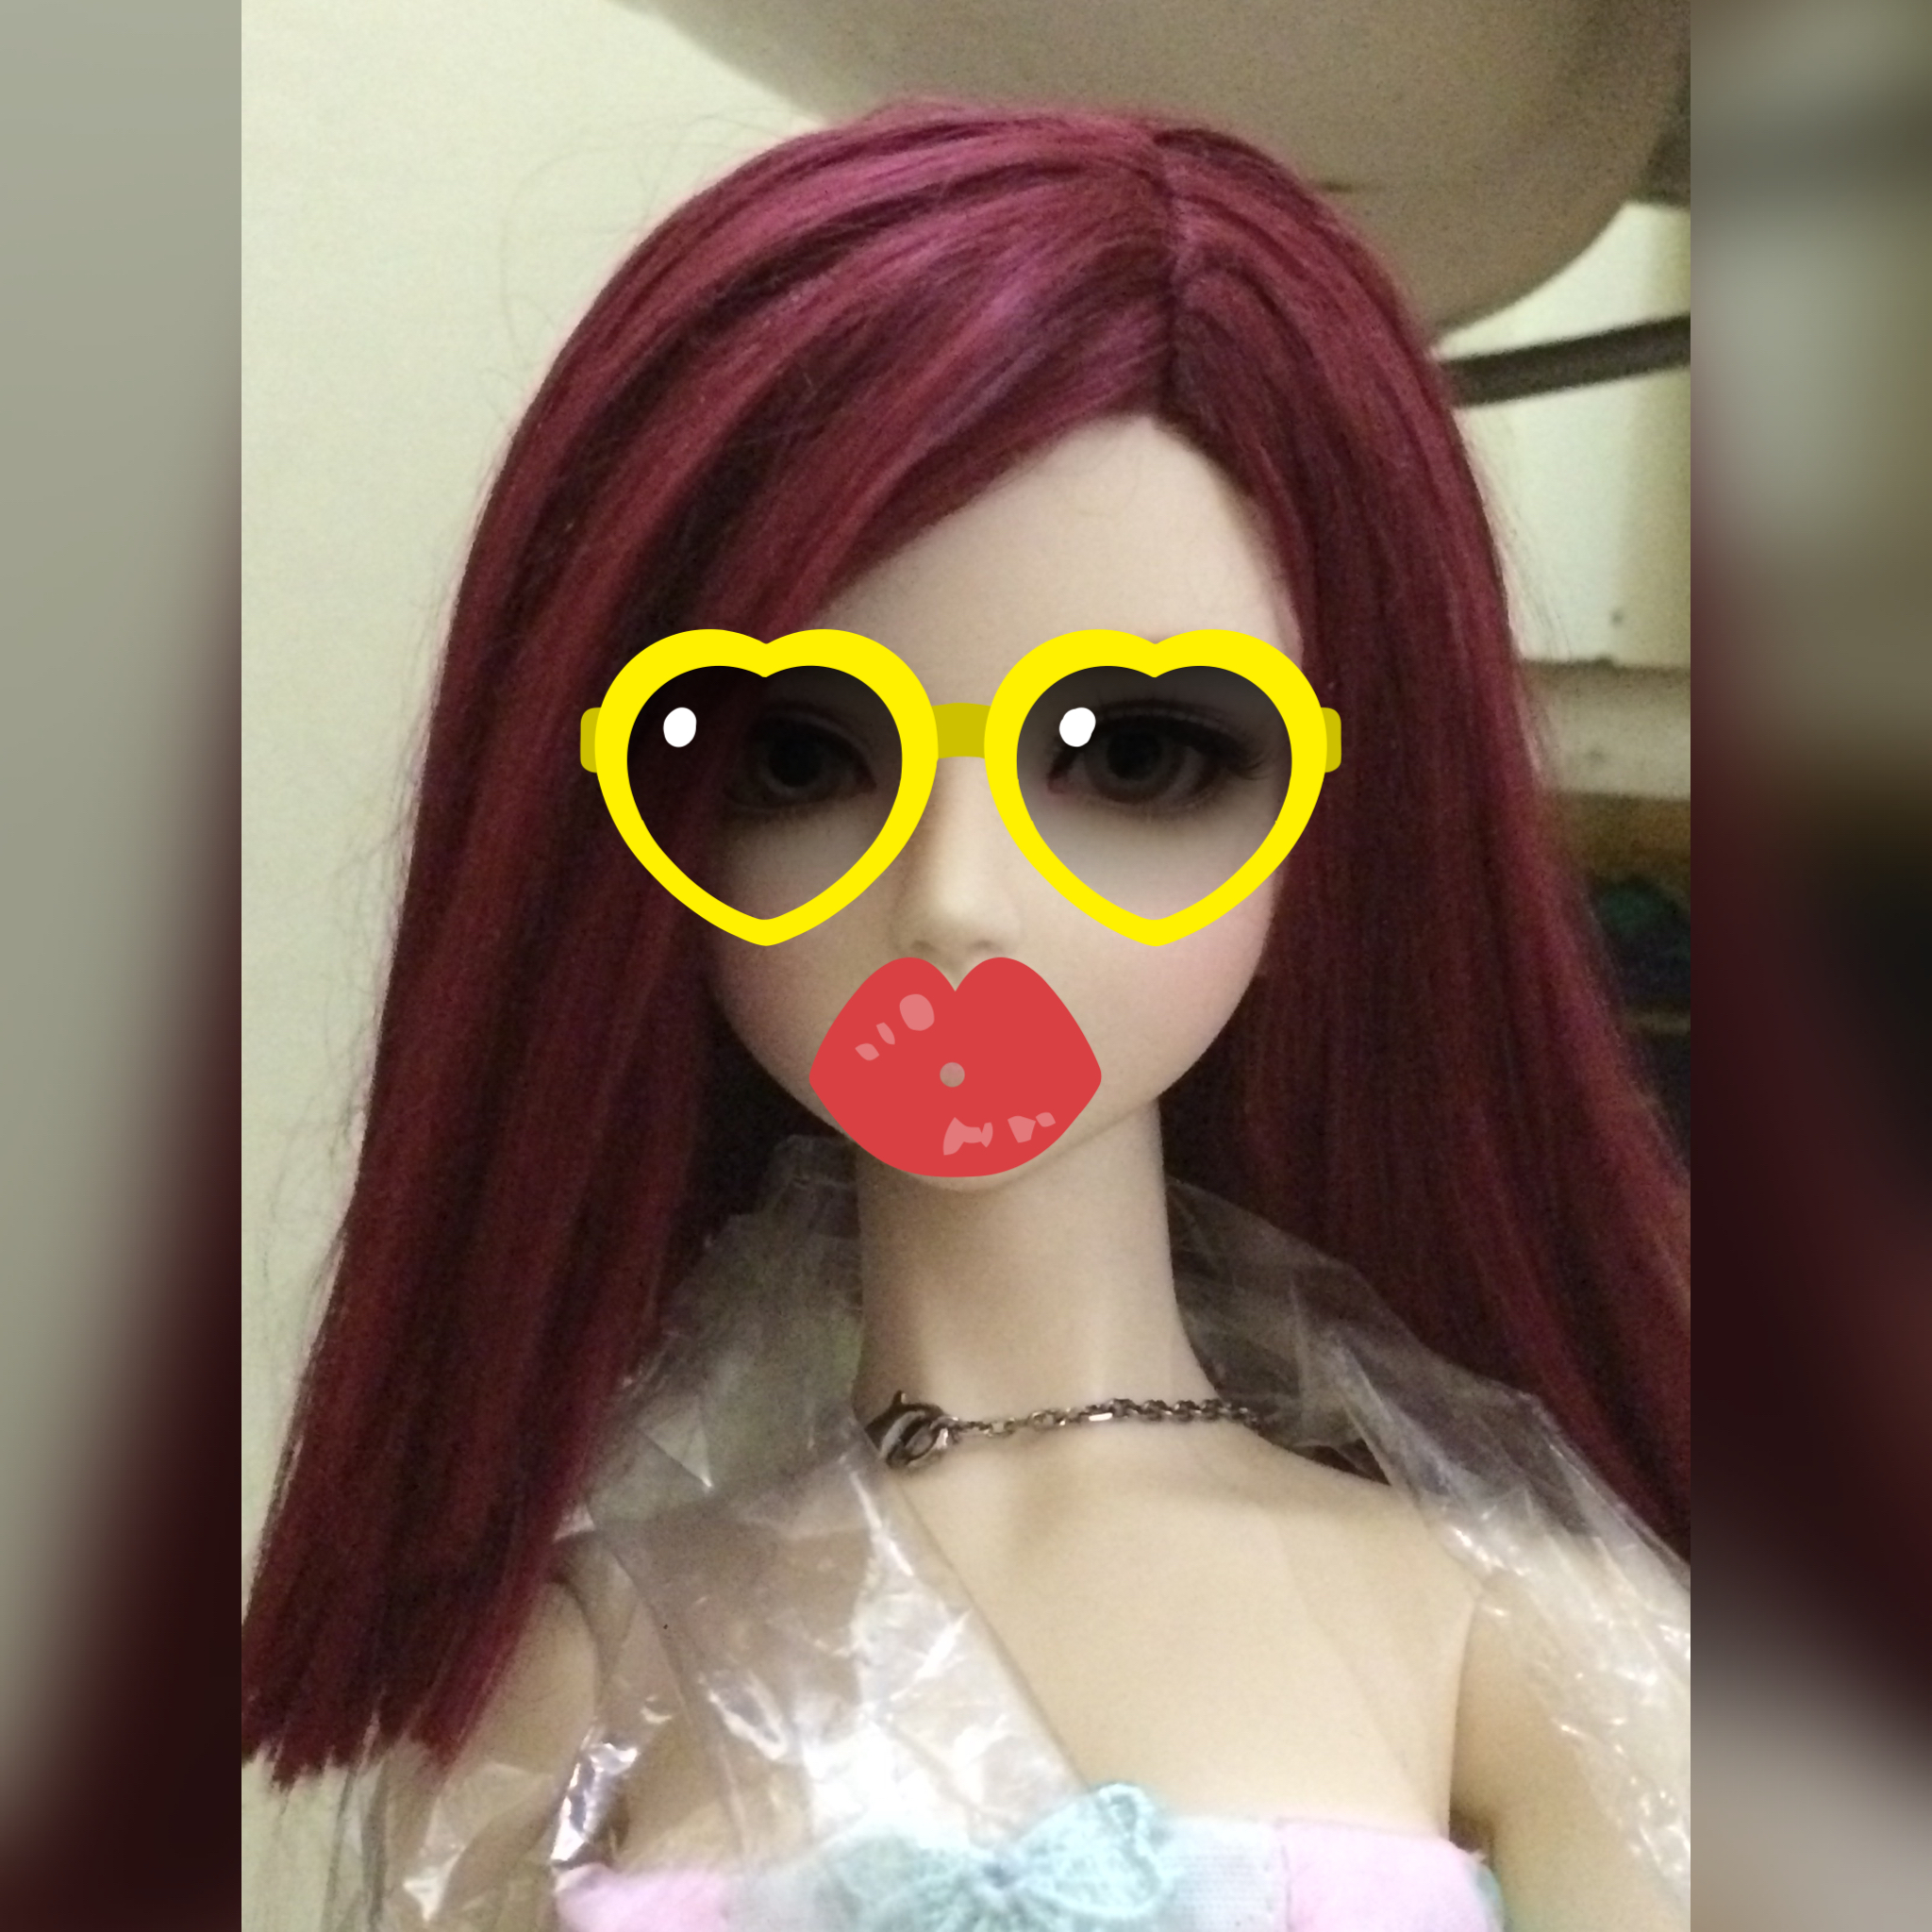
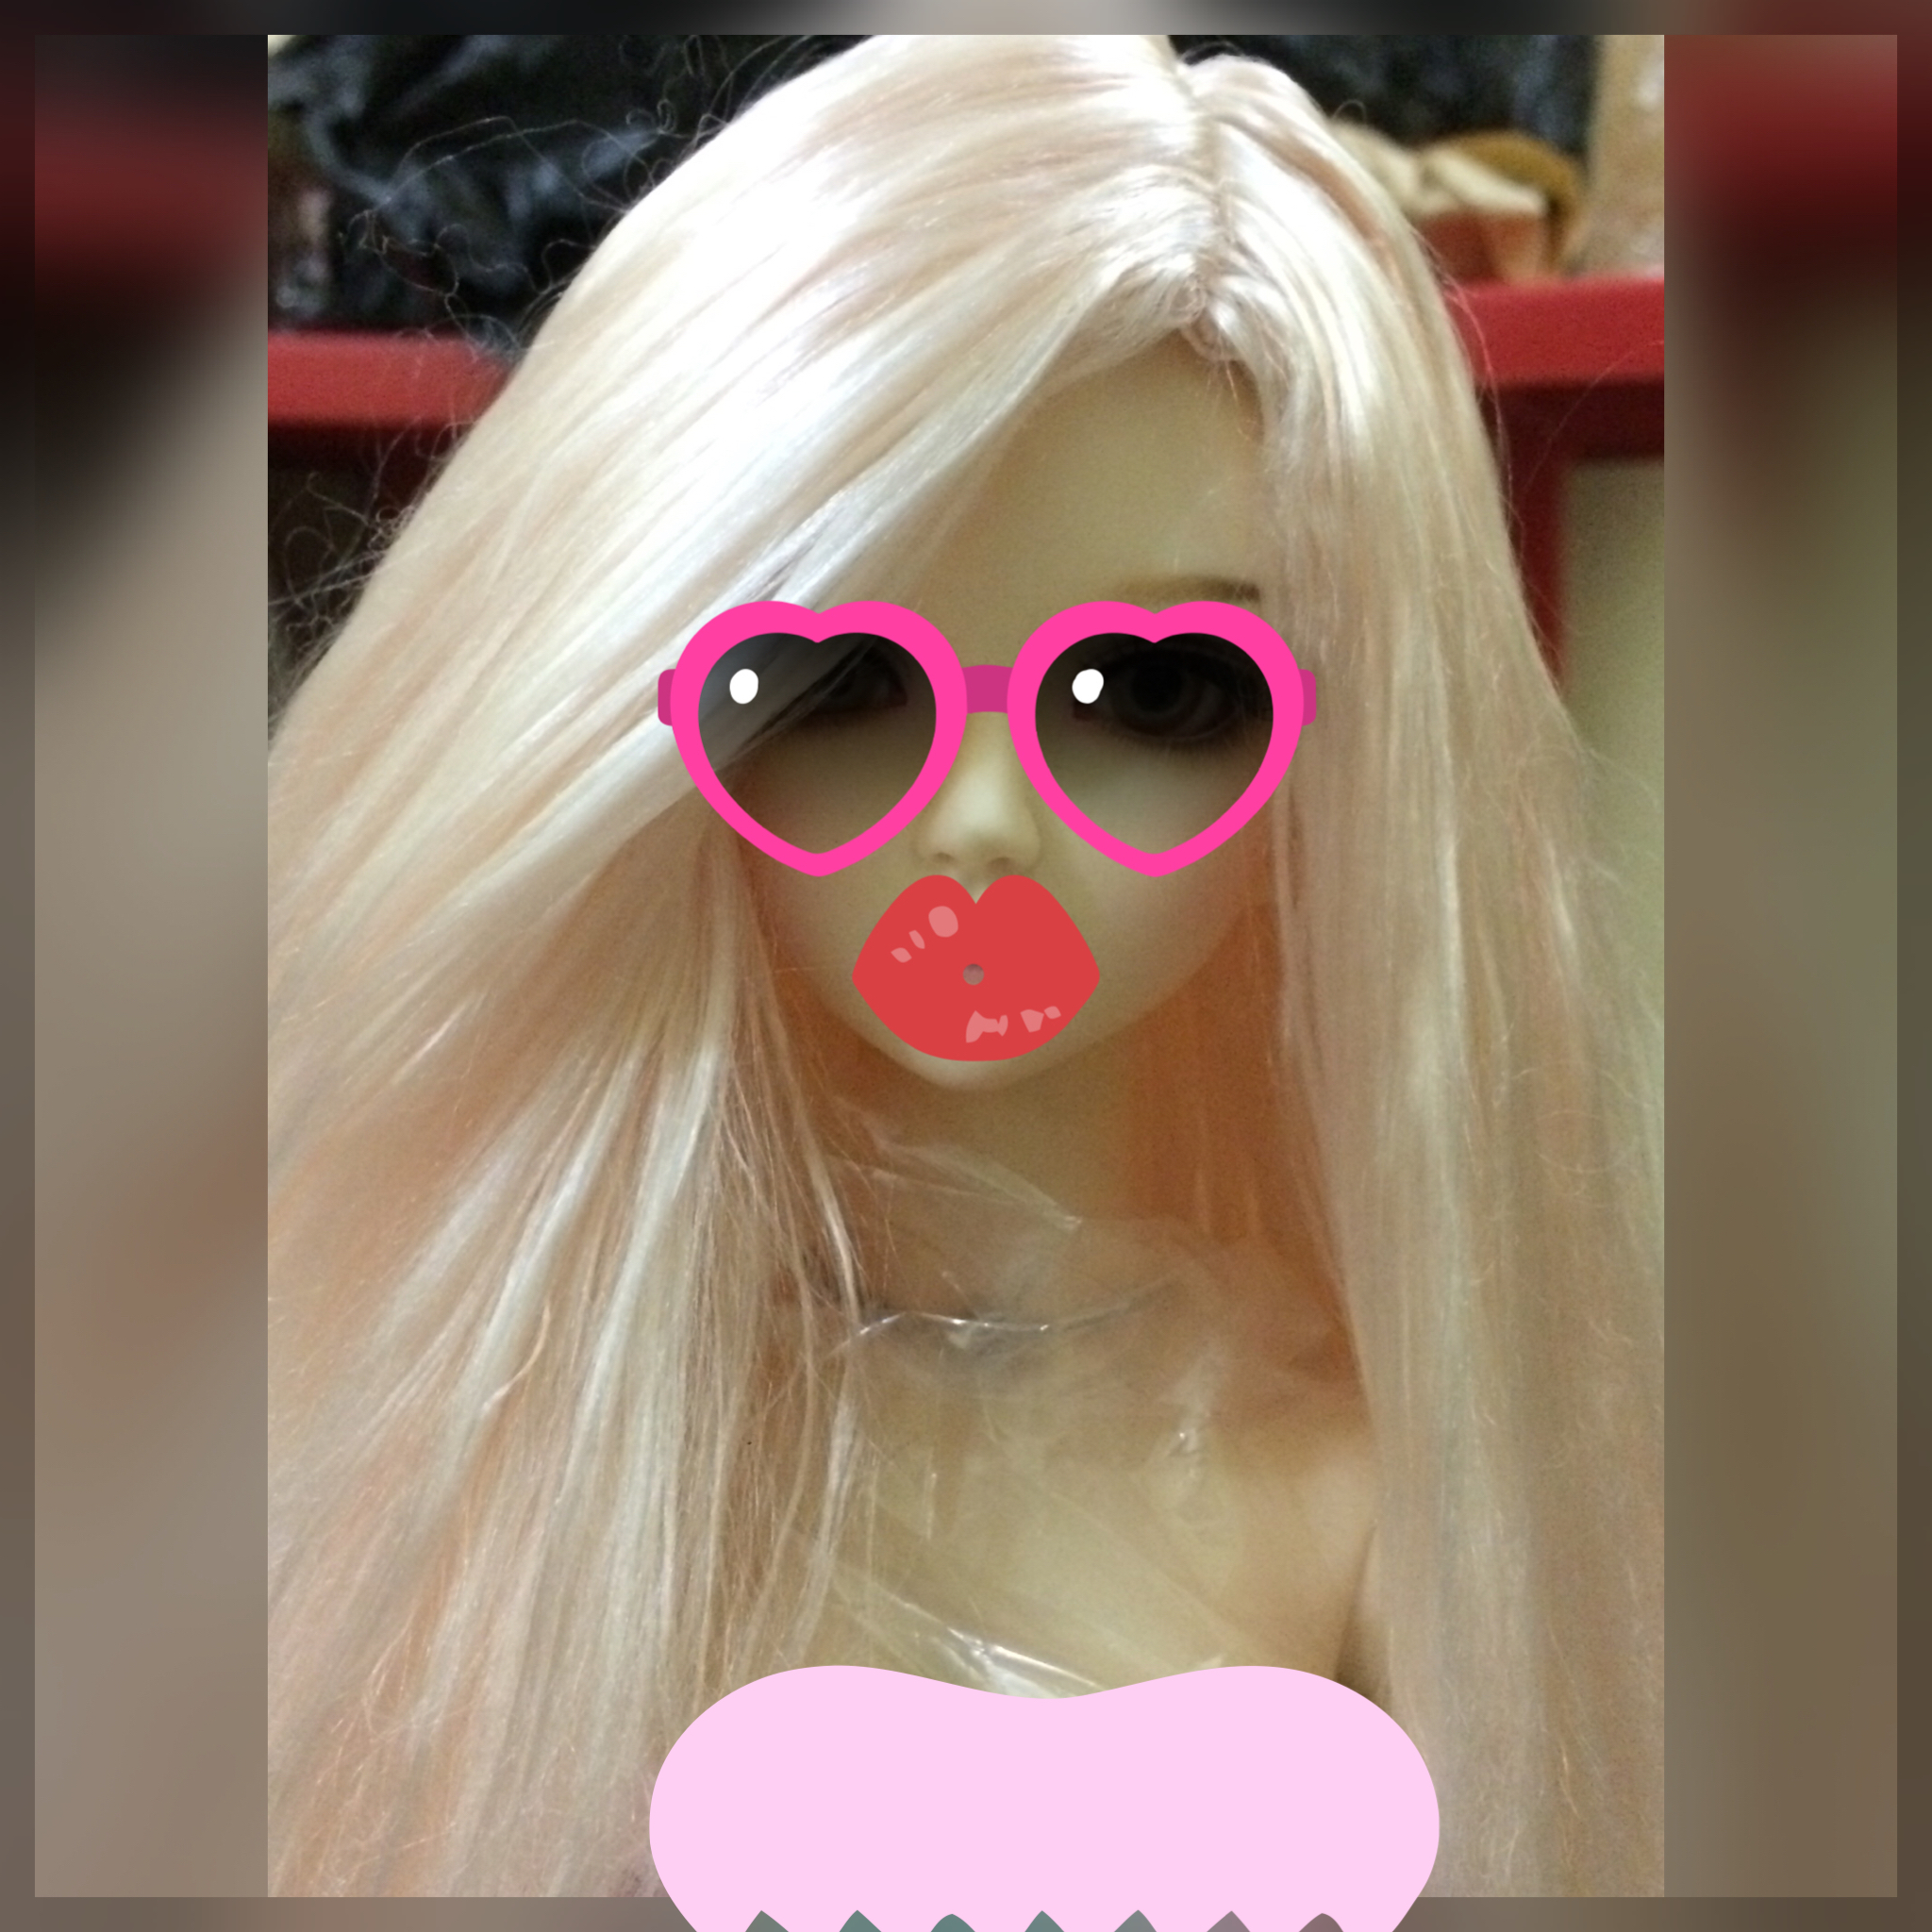
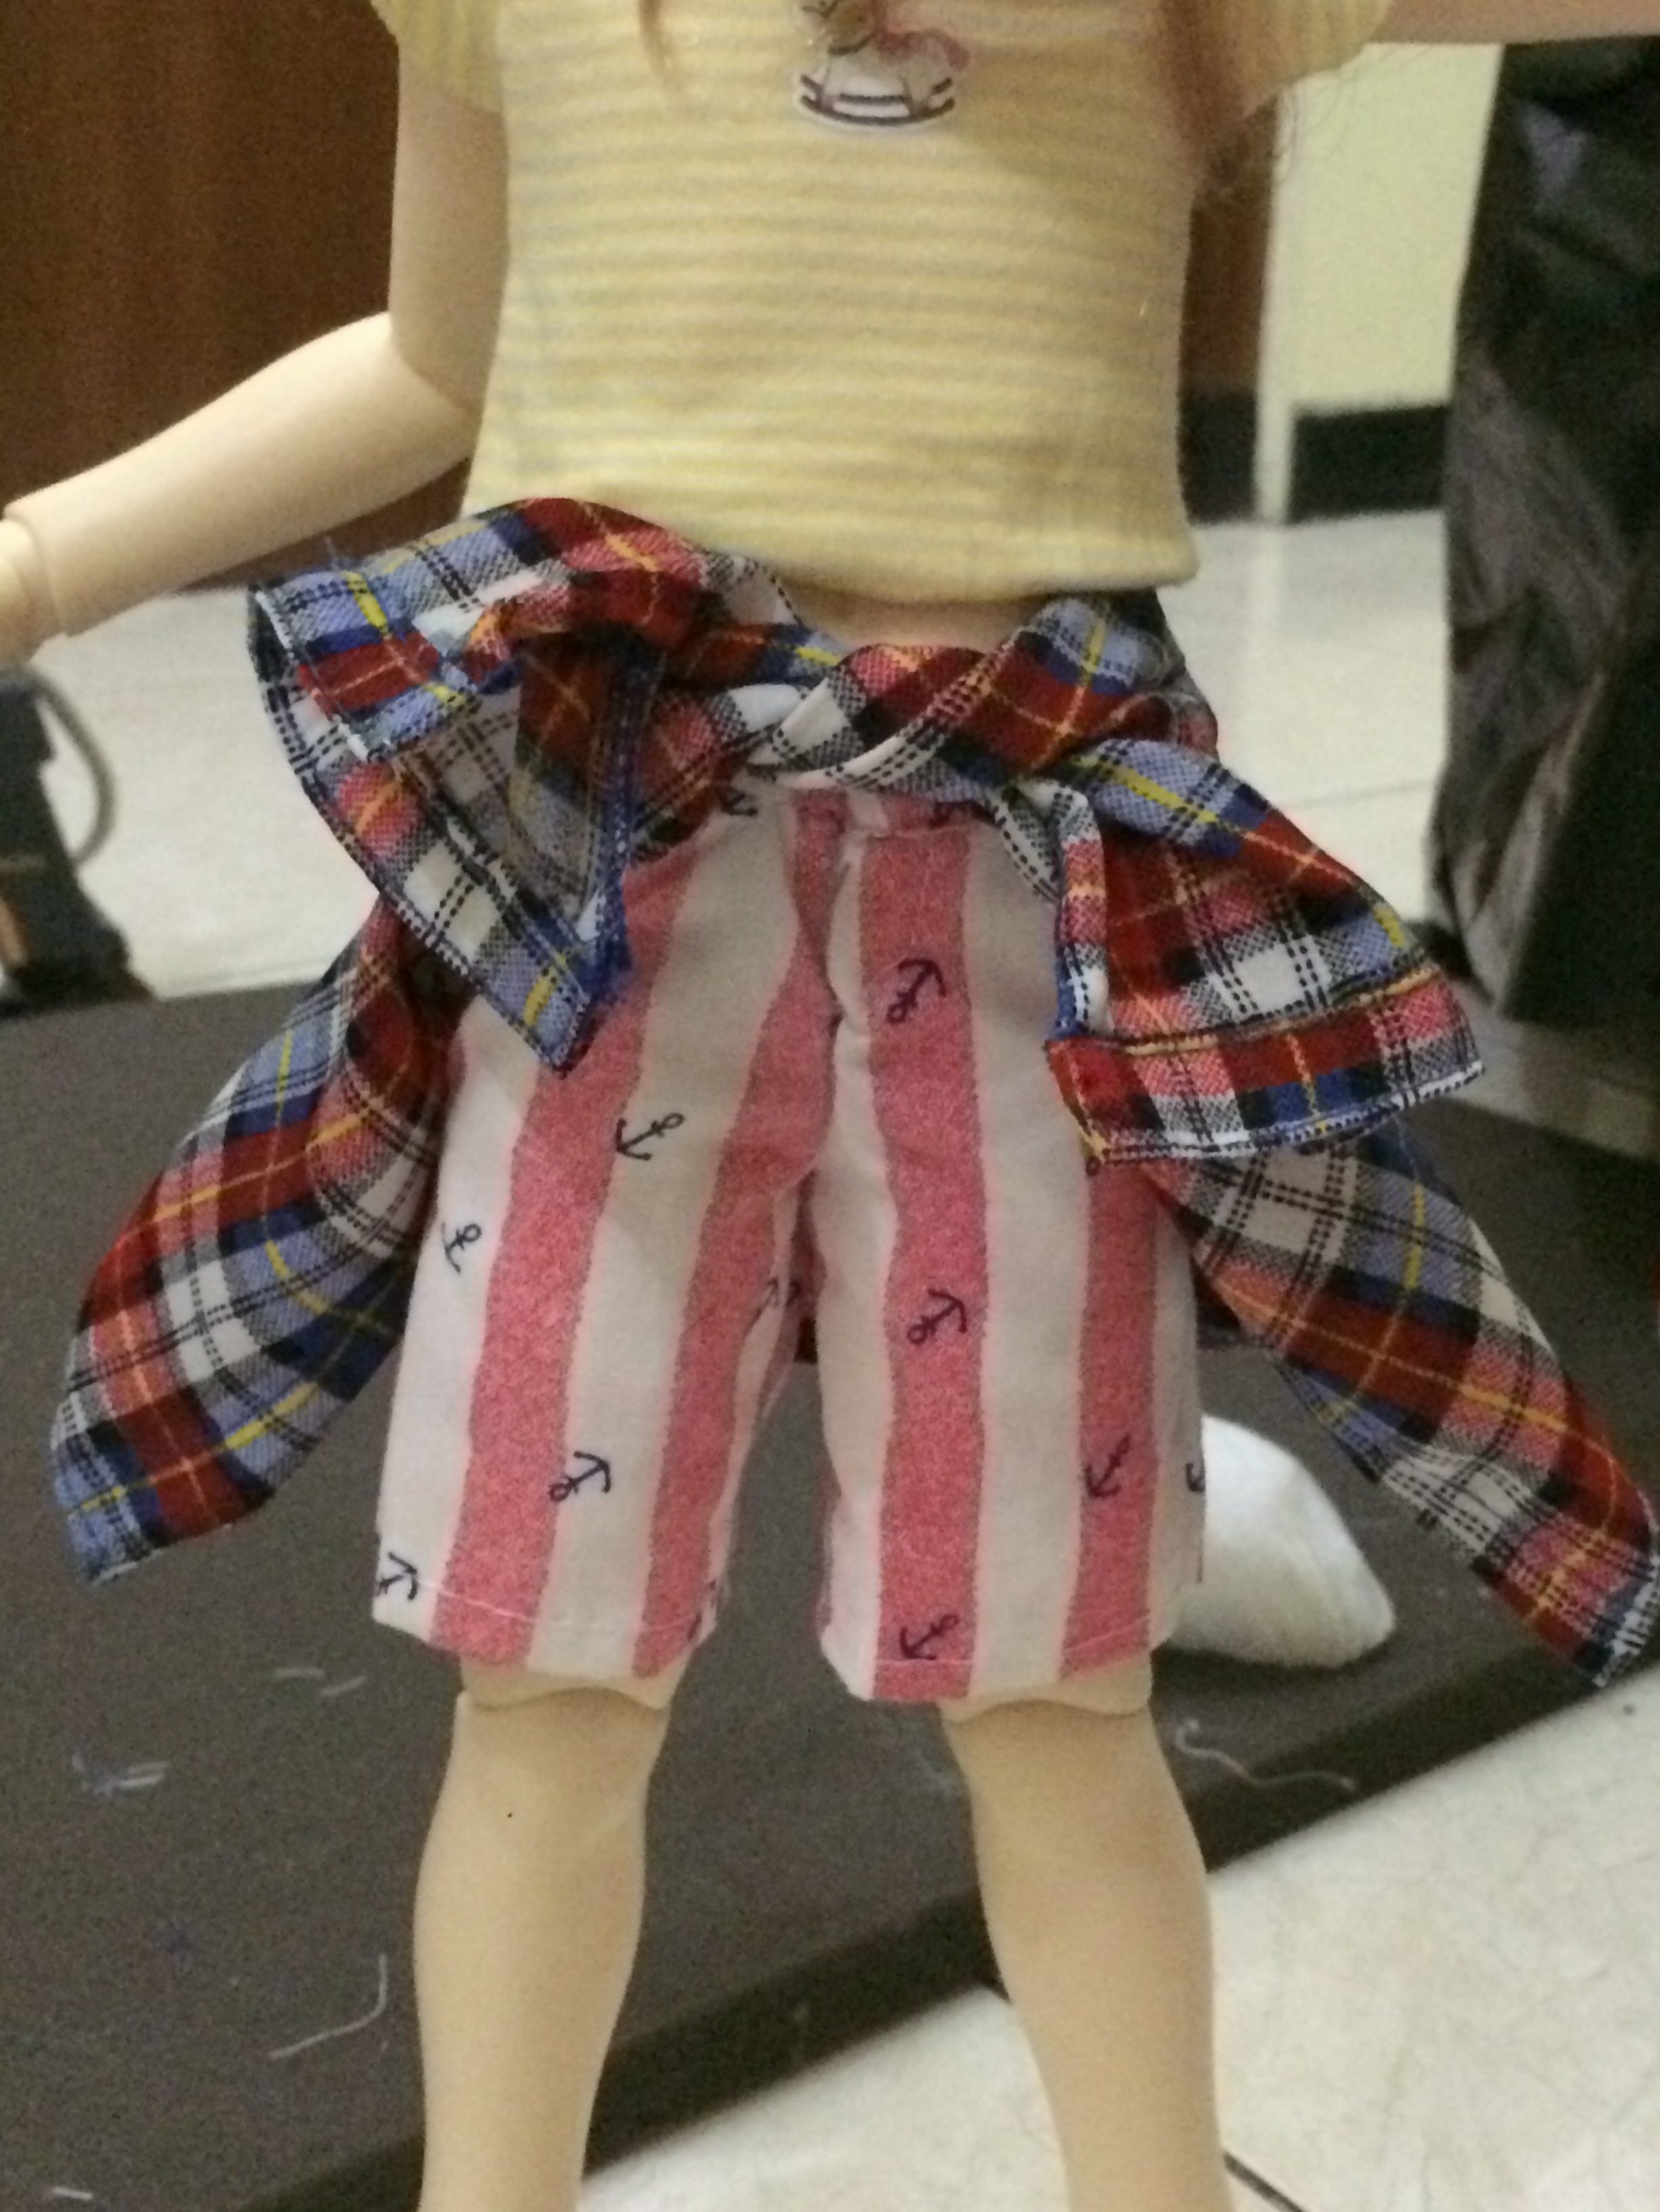
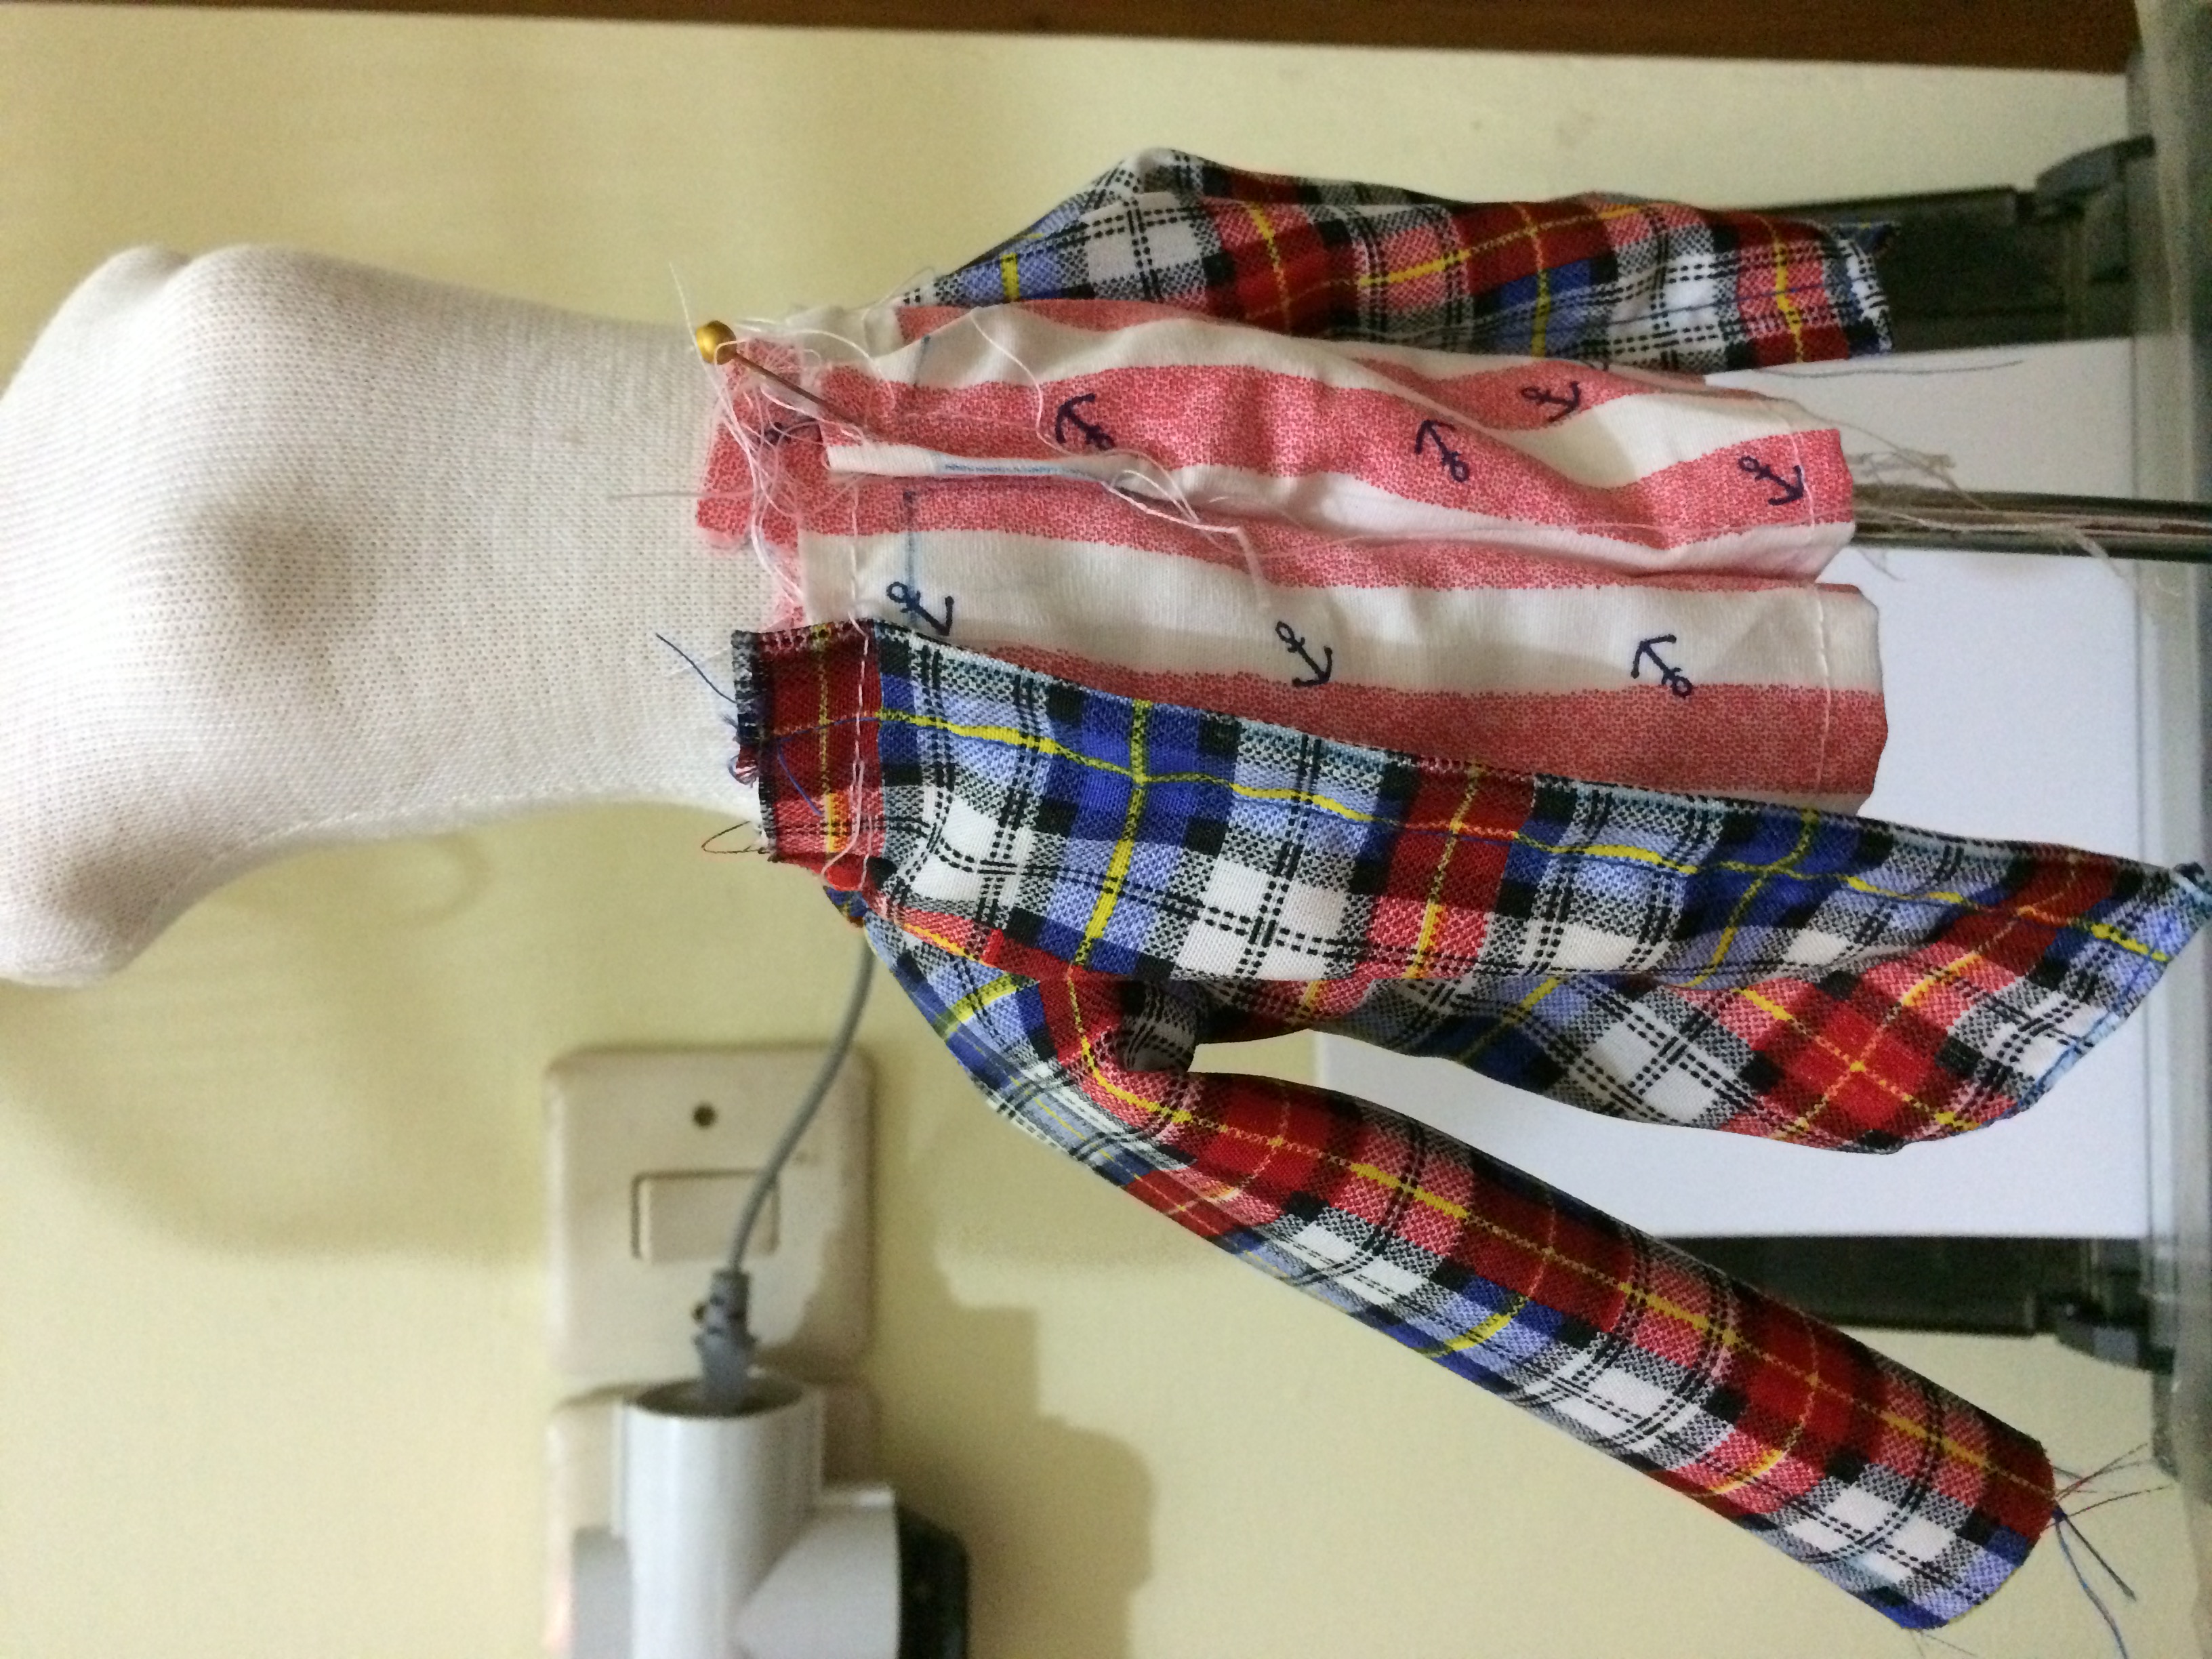
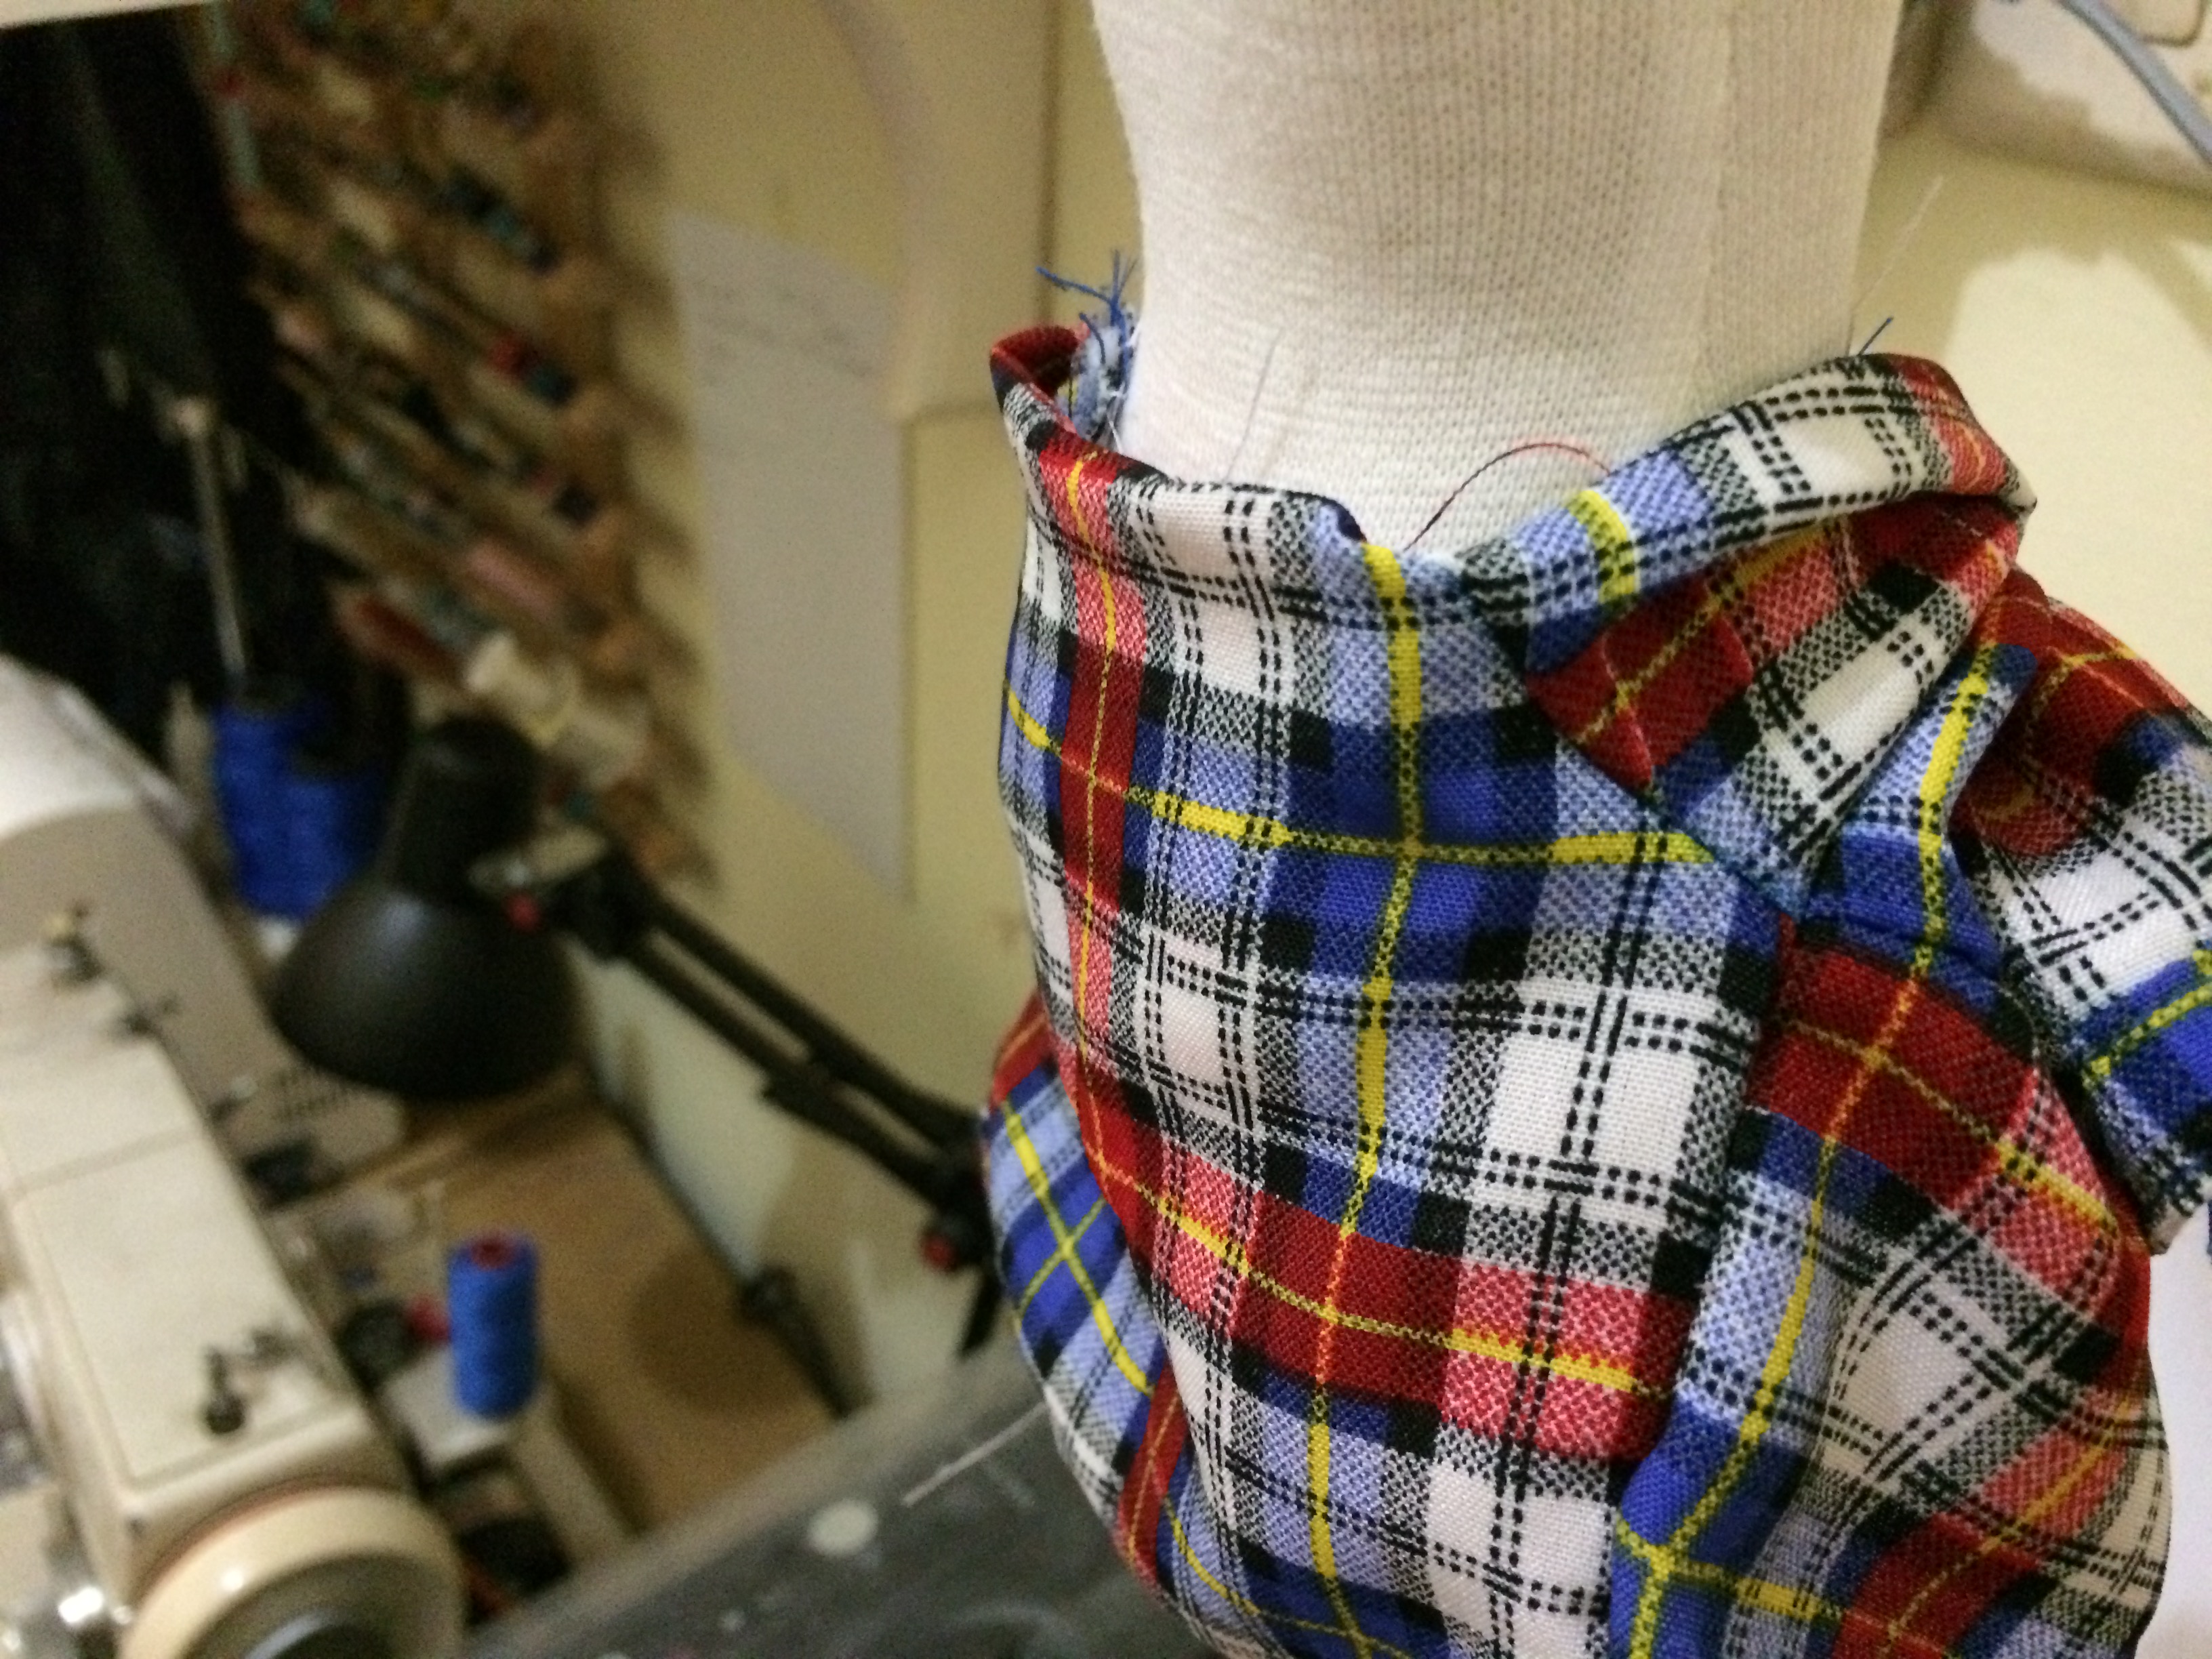
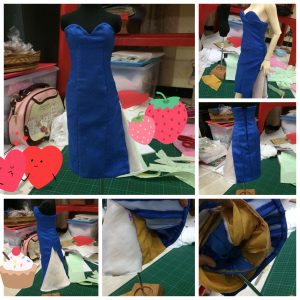
The clothes below is my project. It’s done unprofessionally for myself.

  1. I didn’t serge the whole seam edges.
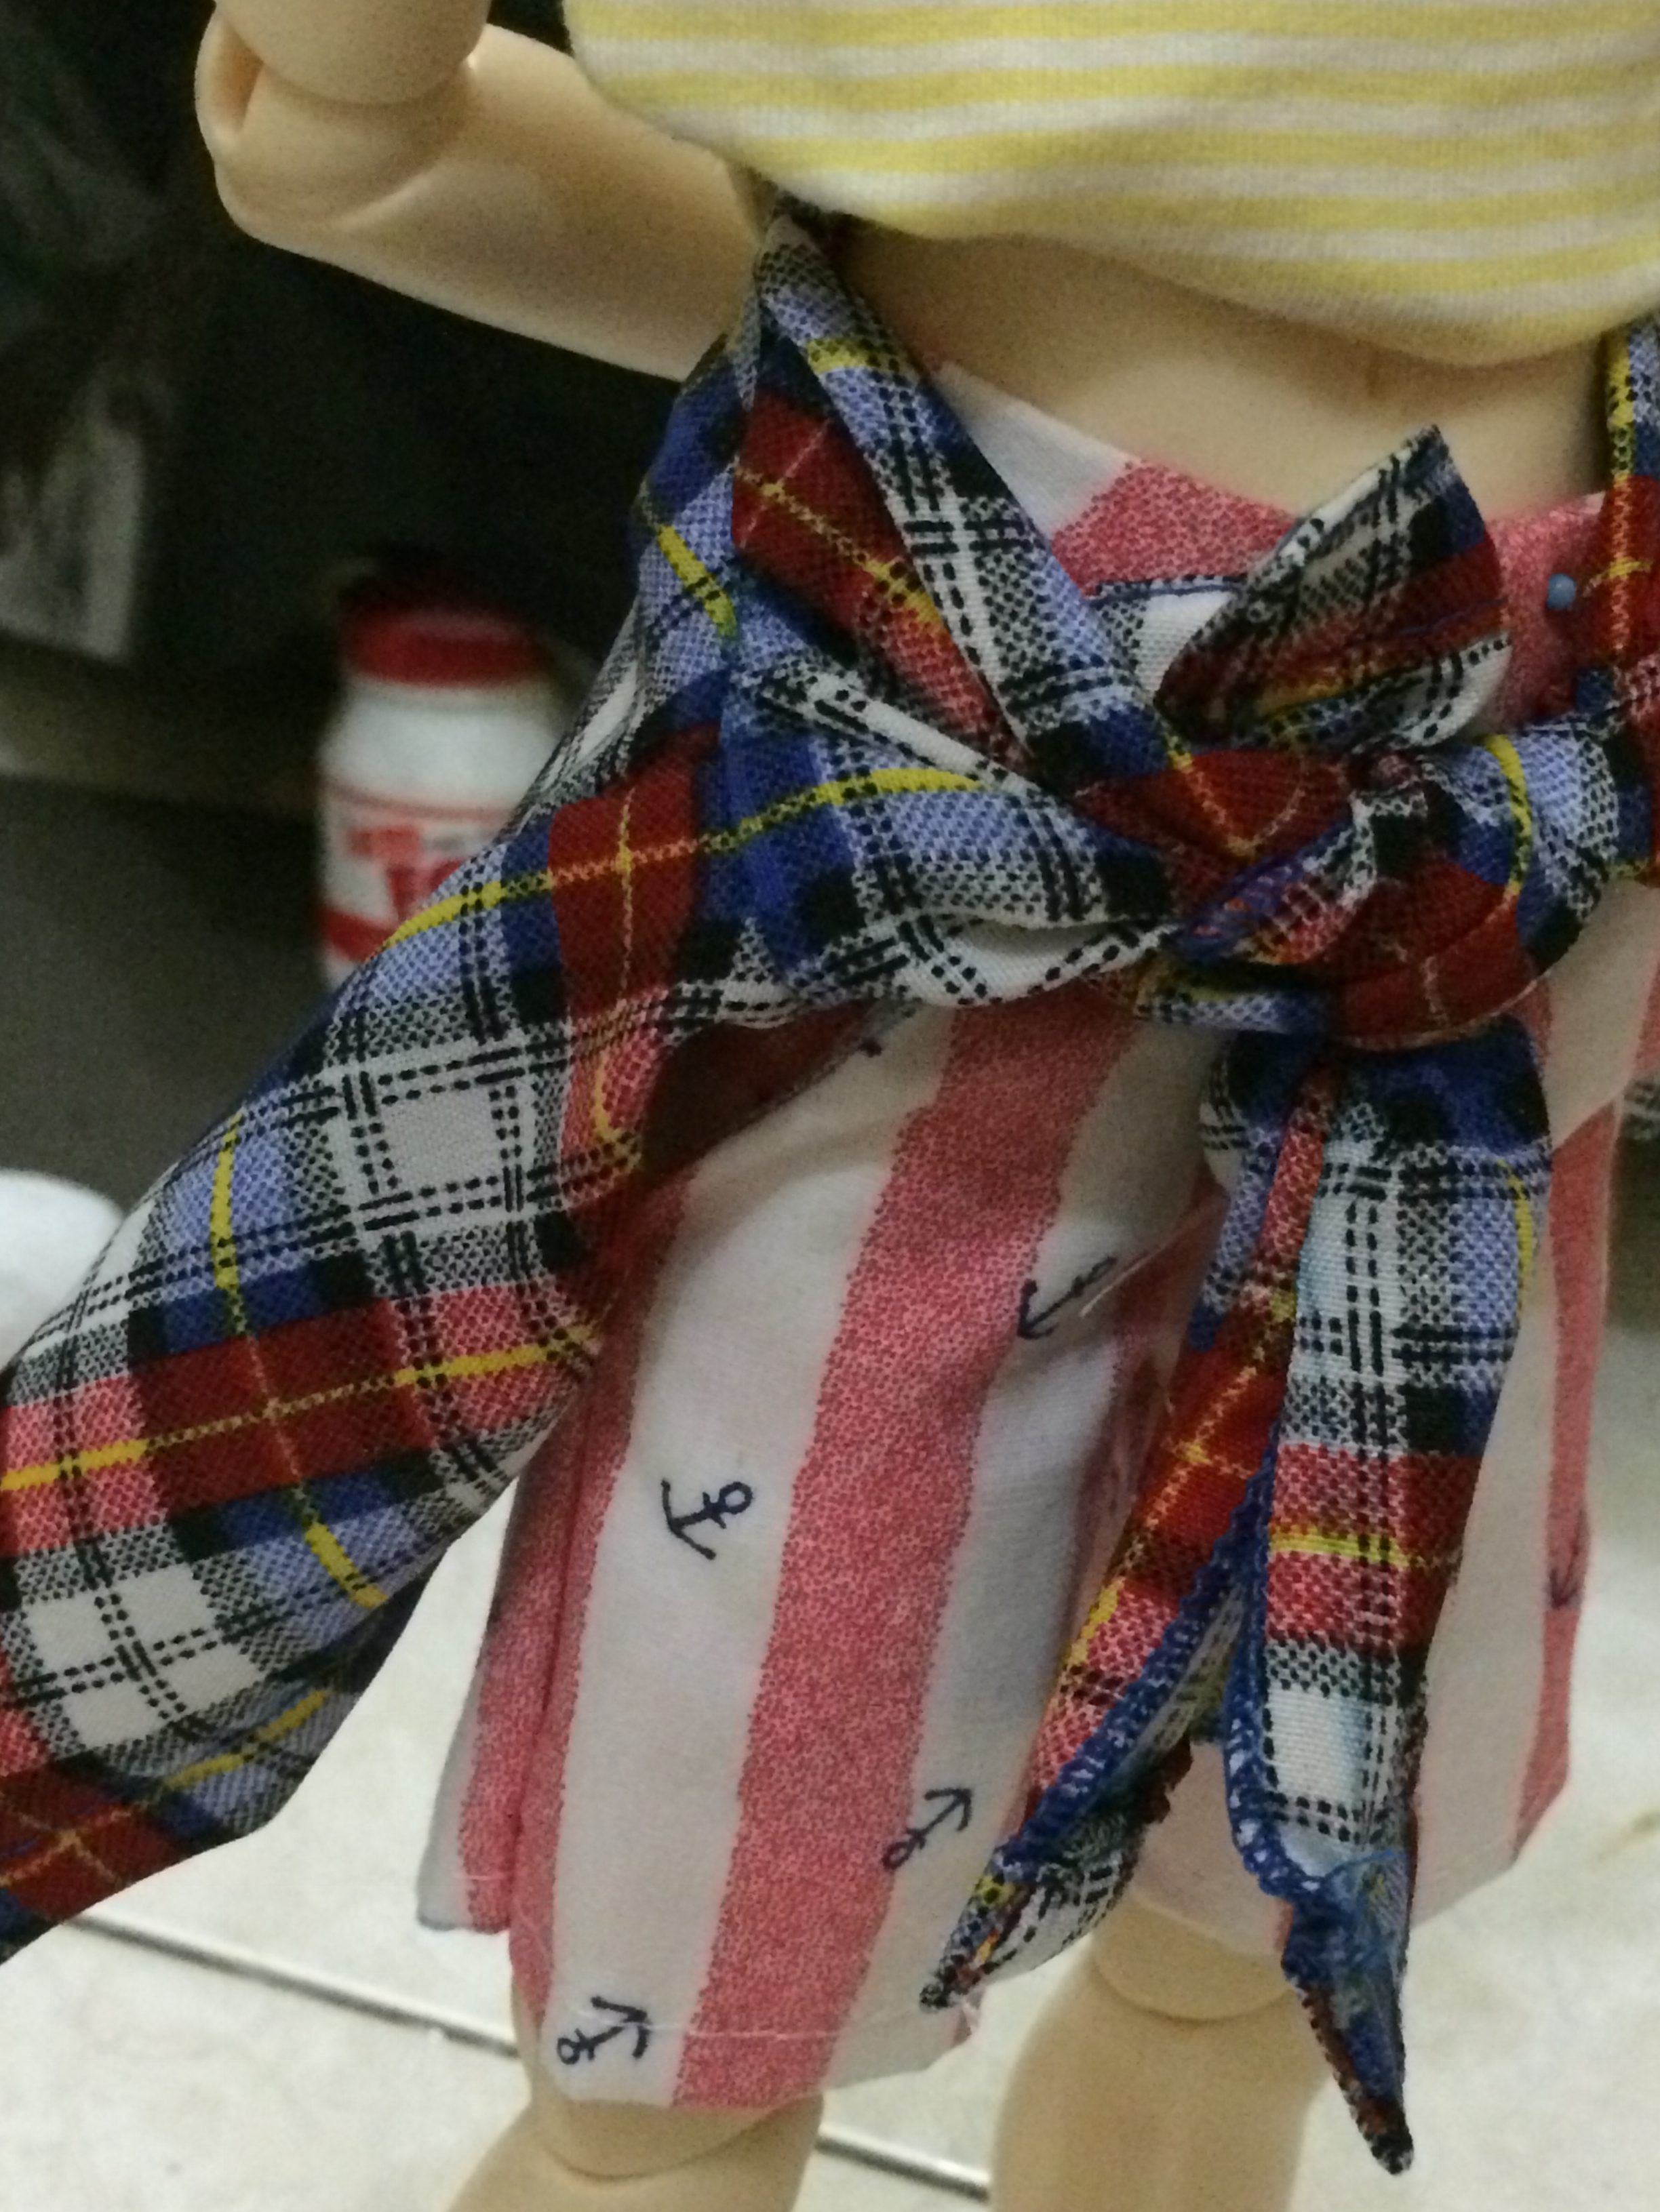
  2. I cut scallop and zigzag for some seam edges and some edges, i used different scallop size scissor as i forgot where i put the smaller scallop one. haha.  Yet, I still do my best to make it look as neat as possible and ‘fray free’ .
  3. Since I used lining, the inside seam can be hidden but if i don’t used lining, i’ll make sure the serge will be way neater.
  4. I might not use doll zipper like i used here. I might use invisible zipper that is usually used for human clothes. I didn’t sew doll zipper here in wrong way. It’s actually like human regular zipper just the rail is scaled to doll size. I can sew it unseen (with overlap) or seen like this. I don’t like using overlap technique, so I sew it like this.
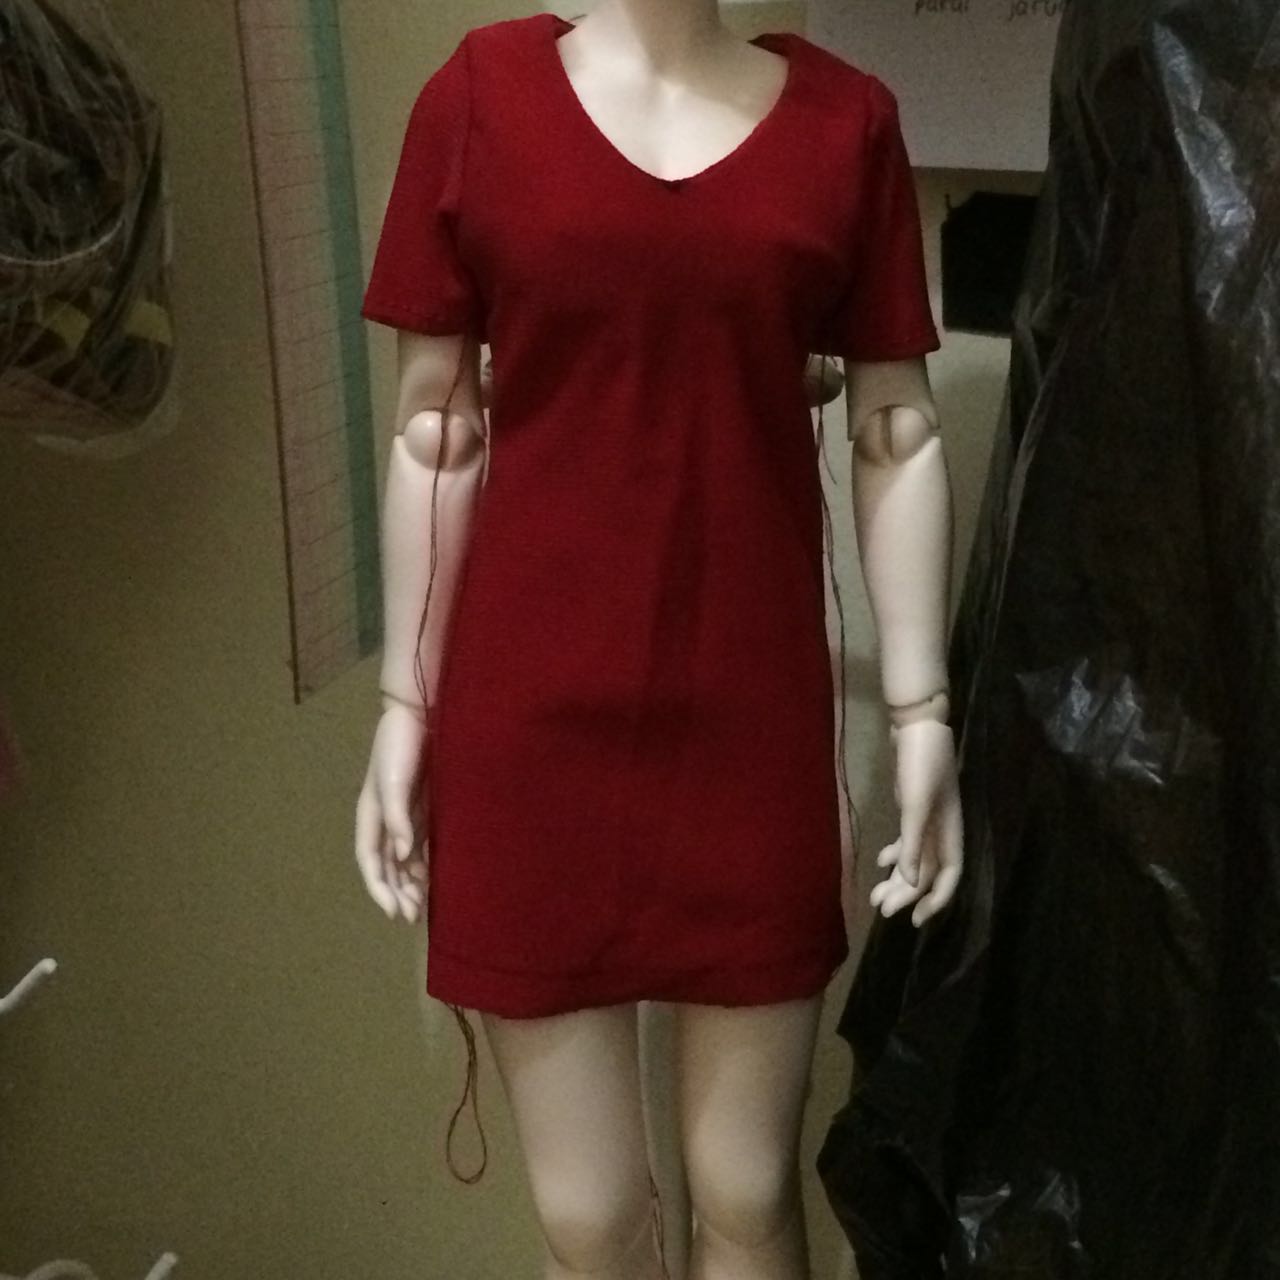
  5. There are two colors on the second layer. white and gold. Actually, it was supposed to be white only but i chose a wrong fabric before, gold. So, I change only some part of it. The lining, i reused the the gold part on it. It was supposed to be white but i didn’t want to waste the fabric i cut. So, yes, I reused it. That’s why the white on layer 2 has a bit ‘goldie’. It is because the lining under is gold.

image

That dress… I won’t do those things above  if it was for selling. NO WAY.

*if you see, the cup. I handsew it. It will be released later. It won’t be there. :D. So, yes, it’s not a mistake.

For other clothes without lining, even if for myself, I serge it almost all clothes I made. May be only a few i didn’t serge bcs of the nature of the fabric which can’t be handled by my serger machine and because of the nature caused by the size. For example, serging small clothes can create thickness which can make the whole result looks not at maximum.


NB: I didn’t mean to judge other people’s work. It’s up to them how they want to do it but when it comes to ‘selling’, the word ‘professionalism’ follows. Sometimes I saw that some people are able to sell a lot even without that word follows. The worse is sometimes they beat up the ones who try to sell in professional way by badmouthing so they can be more exist or above the those people.

Anyway, it’s up to the buyer also which product they want. Their money their right

It’s just my opinion. Even if i’m still fighting to market my product, even to produce it (as i’m so busy as a mother of twins), that ‘professionalism’ thing is in my head and heart. I’m not perfect but I can still make it differ between ‘doing the best’ and ‘doing as fast as possible, wth with the result’. I saw my non-seamstress friend’s work. Awesome. Very neat. I could feel her effort came from heart and mind. Doing the best is definitely a tag to her work.

Wig R&D No.2

image

This is my second R&D wig. It was a mess. the fibers weren’t enough so I had to cut it again so i could finish it. The parting line is still the hardest so far. It is the fiber handling versus glue that makes it difficult. Need to practice more.

Posted in R&D

Wig Project no 1.5

imageimageimage

This was supposed to be my first trial but it was postponed because I ran out of fiber. Haha.

I changed the technique in the middle that why the right side of the parting line is kind of thicker than the left side (>-<)”’ .

I haven’t ironed the wig yet but already cut it. I haven’t had any knowledge about hair cutting so, yes, it was a mess. (^O^)”’.

I annoyingly hide my doll face. (>u<)


Using viscose fibers seems easy as it’s soft and in my case, it’s straight but in reality, it is super soft and fine that i can say, it’s ‘fragile’ and easily separated. Once it’s separated uncontrollably, it becomes a disaster.  So, I have to separate it very carefully so, i have minimum fibers to waste.

  • I use  tooth pick to separate it and then while picking separated fibers with my right hand, my left hand hold/push the rest of fibers so they wont stick to the fibers i’m picking.
  • I then glue the tip of fibers i pick. So, it won’t be separated anymore as well as easier to put on the wig cap. I figured out about this while experiencing the trouble  but then someone show me the video about it and then I aaah…ok, I’m on the right track.

Those two are very important to start. How to put it on the wig cap etc, you can search it in youtube or support an artist video by paying it. I heard from a friend, Andreja made a video about it but we have to pay to see it. (^_<)d


Finished: Trial 1

imageimage

i really still have to search  suitable fabric for the shirt. i am washing it now. i will be processing it with softener afterwards. I will try rayon next time.

This is r&d for both pants and this style at the same time. i was working on volks pants and this style at the same time. so i just made it as i could achieve 2 goals at the same time.


Shirt-Around-Waist Pants

image image

because i was too lazy to make two pants, I made 1 pants but put the shirt on in different way. That’s why you see left and right side are different. It’s not a mistake. It’s intended. Personally, I like the left picture. It’s more natural. When I wrap my shirt around waist, it is like that.


image

When wrapping, i pull up the back of the shirt. As you see, it look ‘folded’ inside. It’s because i pull up the shirt. Somehow, it looks more natural dan if i just let the shirt pulled down. It looks too tight on the hips.

Pattern technique:

You have to know how to make shirt and pants. I won’t give you any pattern of it as it’s BASIC sewing. You can find it anywhere in google or buy it from simplicity or purchase burda sewing magazine.

If you have known the technique, here I just want to share where to begin with.

I didn’t use the collar. I thought about it but it’s not necessary even if i want to make it look close to as if the real shirt is wrapped around pants/waist.

I start the pattern from the lower shoulder ‘line’.

The arm sleeves are FULLY made. and sew to the bodice like usually we do when sewing shirt. In this case, that lower shoulder back and front must be ‘a bit’ sew so the sleeve can be sewn on.

After that,  arrange the ‘line’ of lower shoulder back to the front on the pants waist and sew it on.

I actually serge the shirt. It’s difficult to explain how I do it even if I show the pic. My suggestion is, just serge it as you usually do, and you’ll find  a way how to do it next (aka sewing to the waist) naturally. It’s actually easy but a bit ‘confusing’ when doing serge on the sleeves part. Yet, as I said, just do it as you usually do and the rest will come naturally. It’s OK though if you don’t want to serge. Here, i just want to say that it’s POSSIBLE to serge.

This pants is kind of trend but not too hits. My friend asked me to make one. She gave me an example picture which the placement of the front shirt on the waist is like the right picture. She actually gave me not too clear picture. The focus of of the camera is ok but the pattern of the pants is kinda confusing and makes me hard to read how the maker sew the pants. So, I just figured out myself about the pattern. All I want is the shirt can be natural look when it’s wrapped around the waist.

My problem now is finding the right fabric. I thought this shirt fabric is thin enough. It may be thin but how it falls is stiff! I’m still going to finish this project because I’ve been thinking of using softener to tame the fabric. Checker fabric for making shirt like this do not have many option in terms of kind of fabrics.

Stretch Fabric Learning

WIP-Stretch Fabric Learning

fabric: jersey stretch

needle: special for stretch fabric #9

This is my second trial. The hand part is bulky because i used interfacing on my lining and the lining covered the bodice’s hand holes. May be for next learning, I should use thinner interfacing. I used common/standard interfacing for this.

I didn’t serge the edge. It may ruin the shape and elasticity. It’s ok for not serging it. My purpose for this learning is to sew stretch fabric for simple shape of clothes as well as learning the finishing technique for this kind of neckline.

Using special needle for stretch fabric is really helpful. I would try this first before using special sewing feet. If it’s sufficient, then it’s ok. I didn’t use special stitch for this as this is for doll. It may not be able to be applied to human clothes sewing. It’s also unable to apply on doll projects like stockings and socks.


Bra R&D Continued

-________- …. i didn’t mean to but i was curious. So, i made another derivation from pattern version 5. I called it Bra version 5-c. -____- . I think, bra R&D has the most numbers of version after asleep eidolon’s pants R&D. I did pants until 5 version too, I think but no such a b c . (^O^)”’.

I plan to stop for a while until bra version 5-c.

One thing I realize after making this version. Big bust tend to suit with ‘low’ shape of bra. I mean, they will look good if the bra doesn’t cover a ‘whole’ bust. Leave out the ‘skin’ and ‘shape’ to show. Perhaps, why my older or first bra versions looked a bit ‘odd’ and ‘conventional’, it was because I made it to cover the ‘bust-skin’ and ‘shape’.