About ncr

love sewing for my dollies, bags, clothes. i also like other crafting like crochet knit needle felting etc.

Real Doll For Quality Control of Handmade Doll Items

Doll torso

I have  a bad experience when purchasing a hand-styled doll wig. The wig, when is put on my doll head, is unbalanced. The back-ties is more to the left. The crafter/stylist said it’s ok on her doll but i’m not sure if she has tested it on her doll head. She just showed me photos of the wig ,before being sent, on wig-stand (wood made, no face of doll, usually the wig elastic won’t be too tight when it is put there). Because of that, i asked her, did you test the wig you sent to me to your doll head. She didn’t respond to that, instead kept insisting that it was impossible that the wig was unbalanced without her  knowing. (Her wigs are usually ok but when it comes to ‘hand-style’ by her, it’s risky apparently. So, I will not buy her handmade-styled wig again. I will just buy her regular wig).

While chatting to my dear friend who shopped with me, I said few things. This is what I’m going to write here.

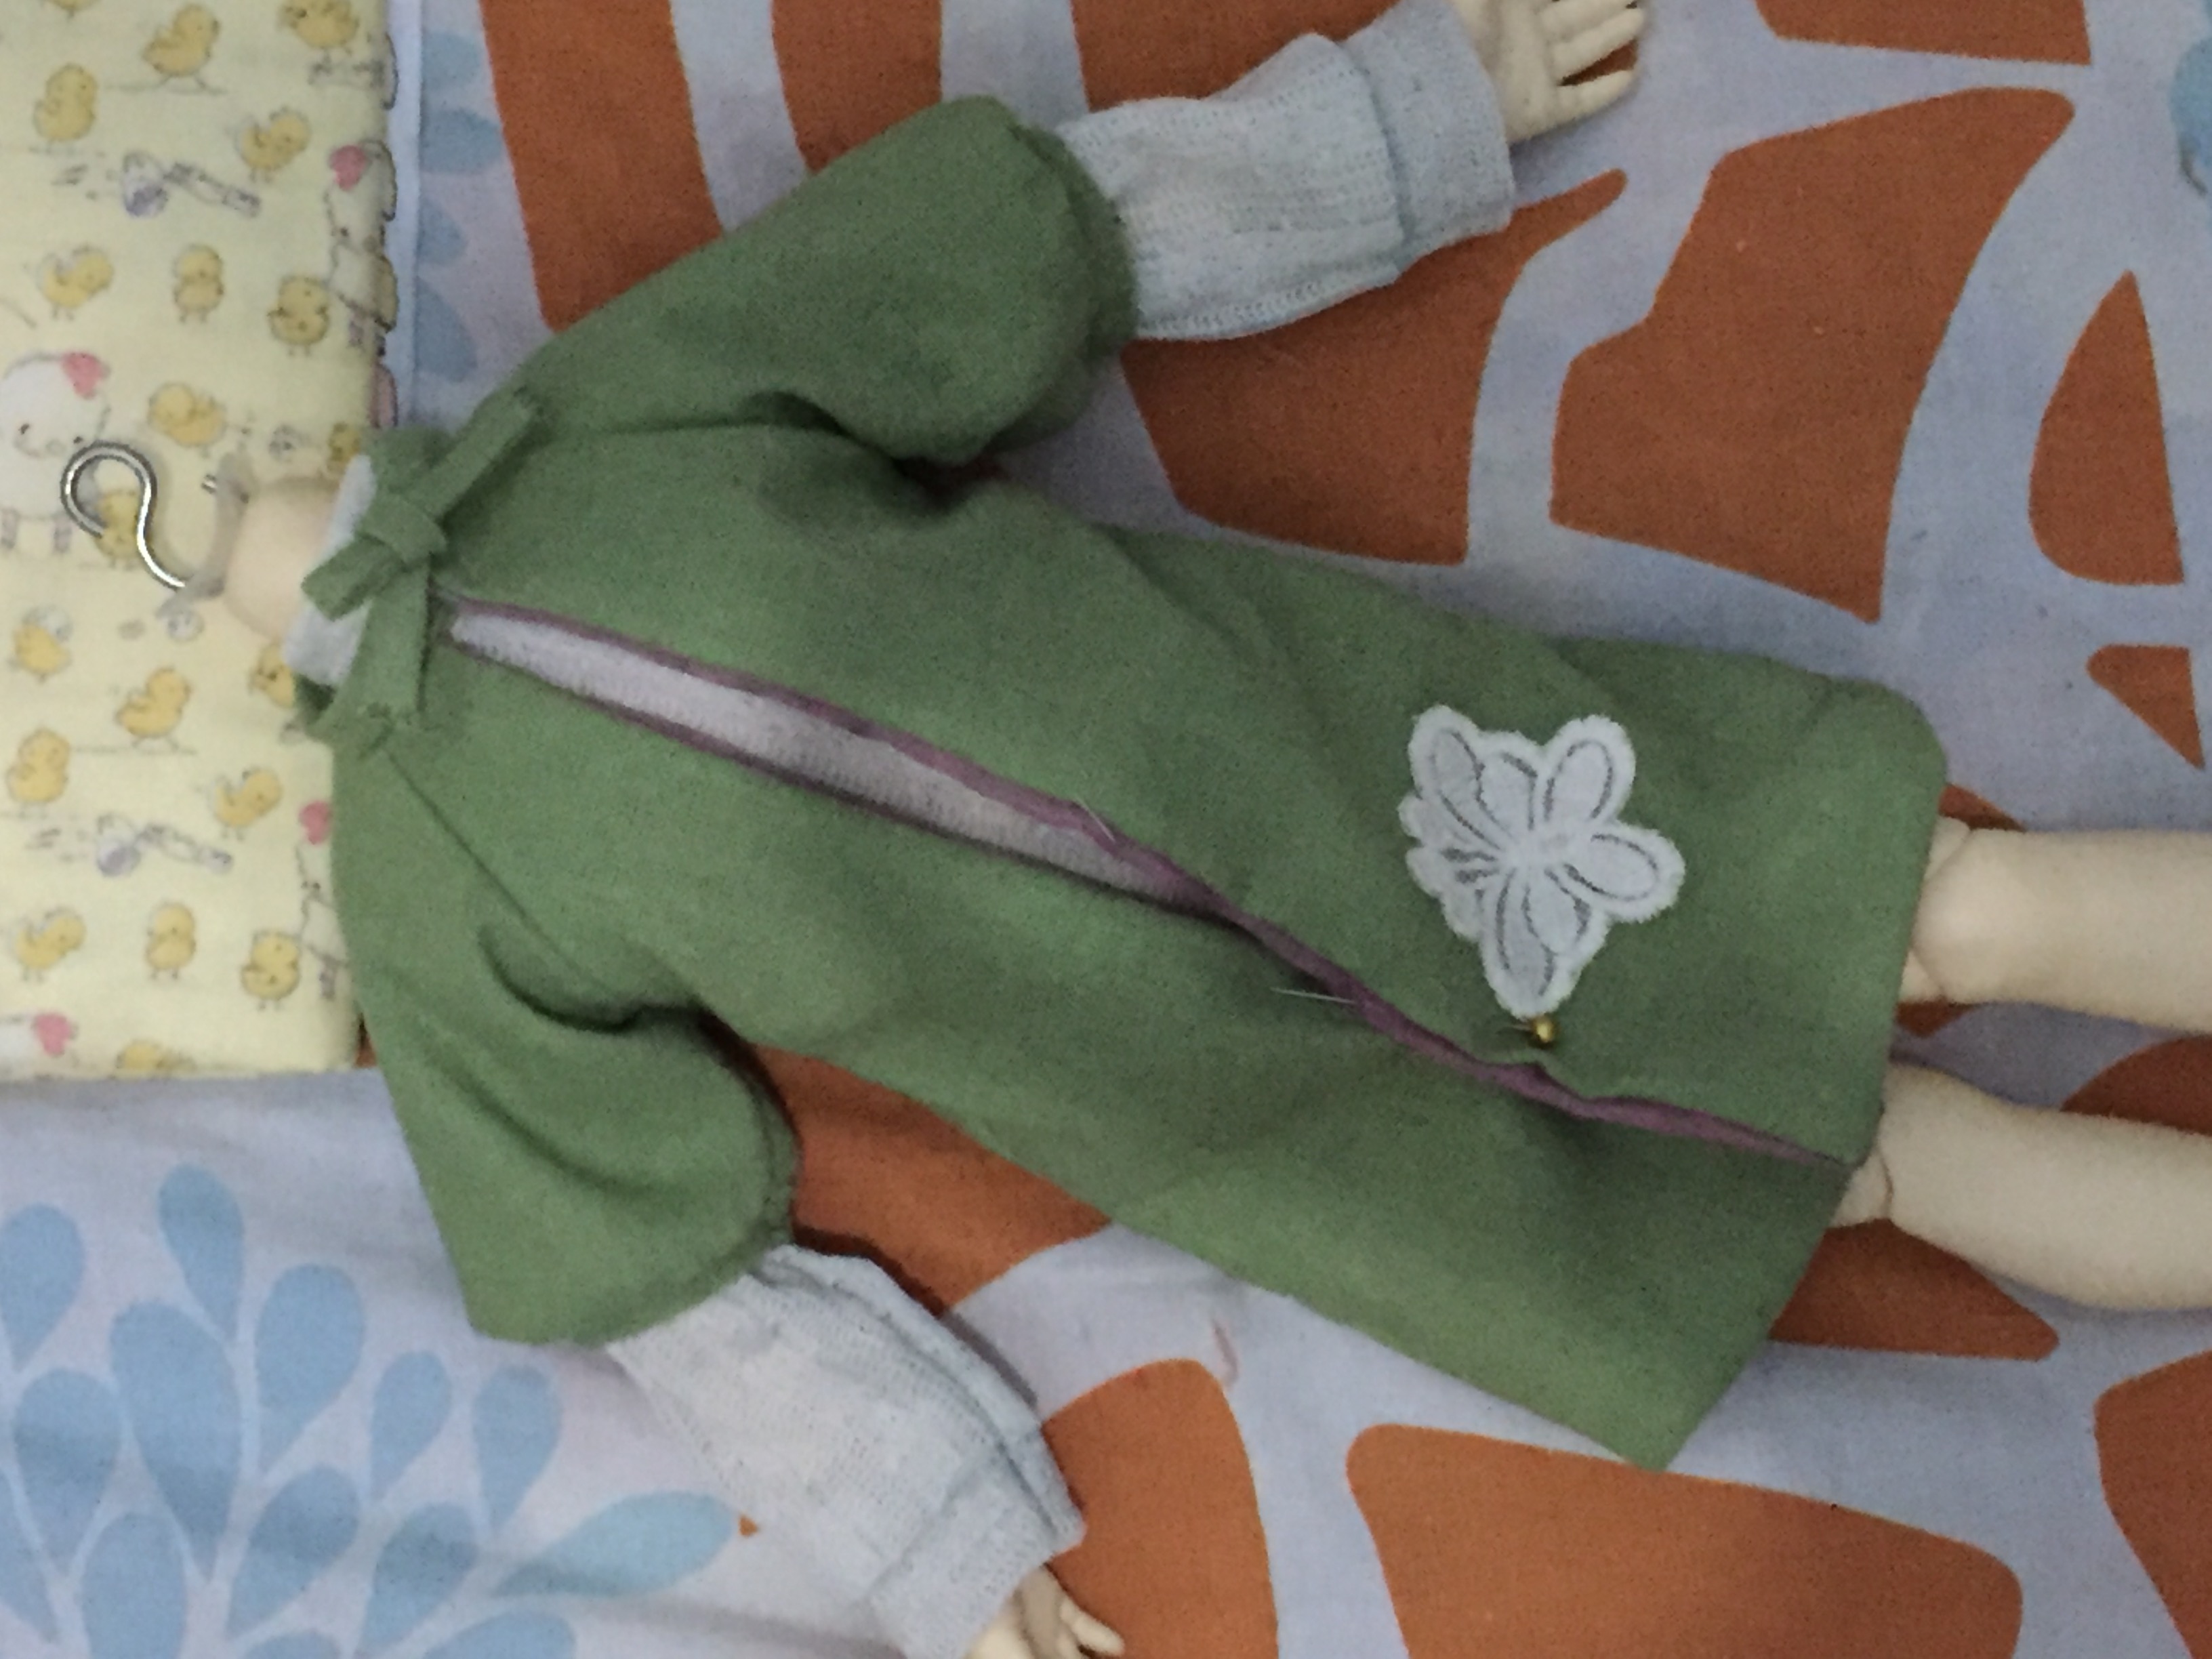
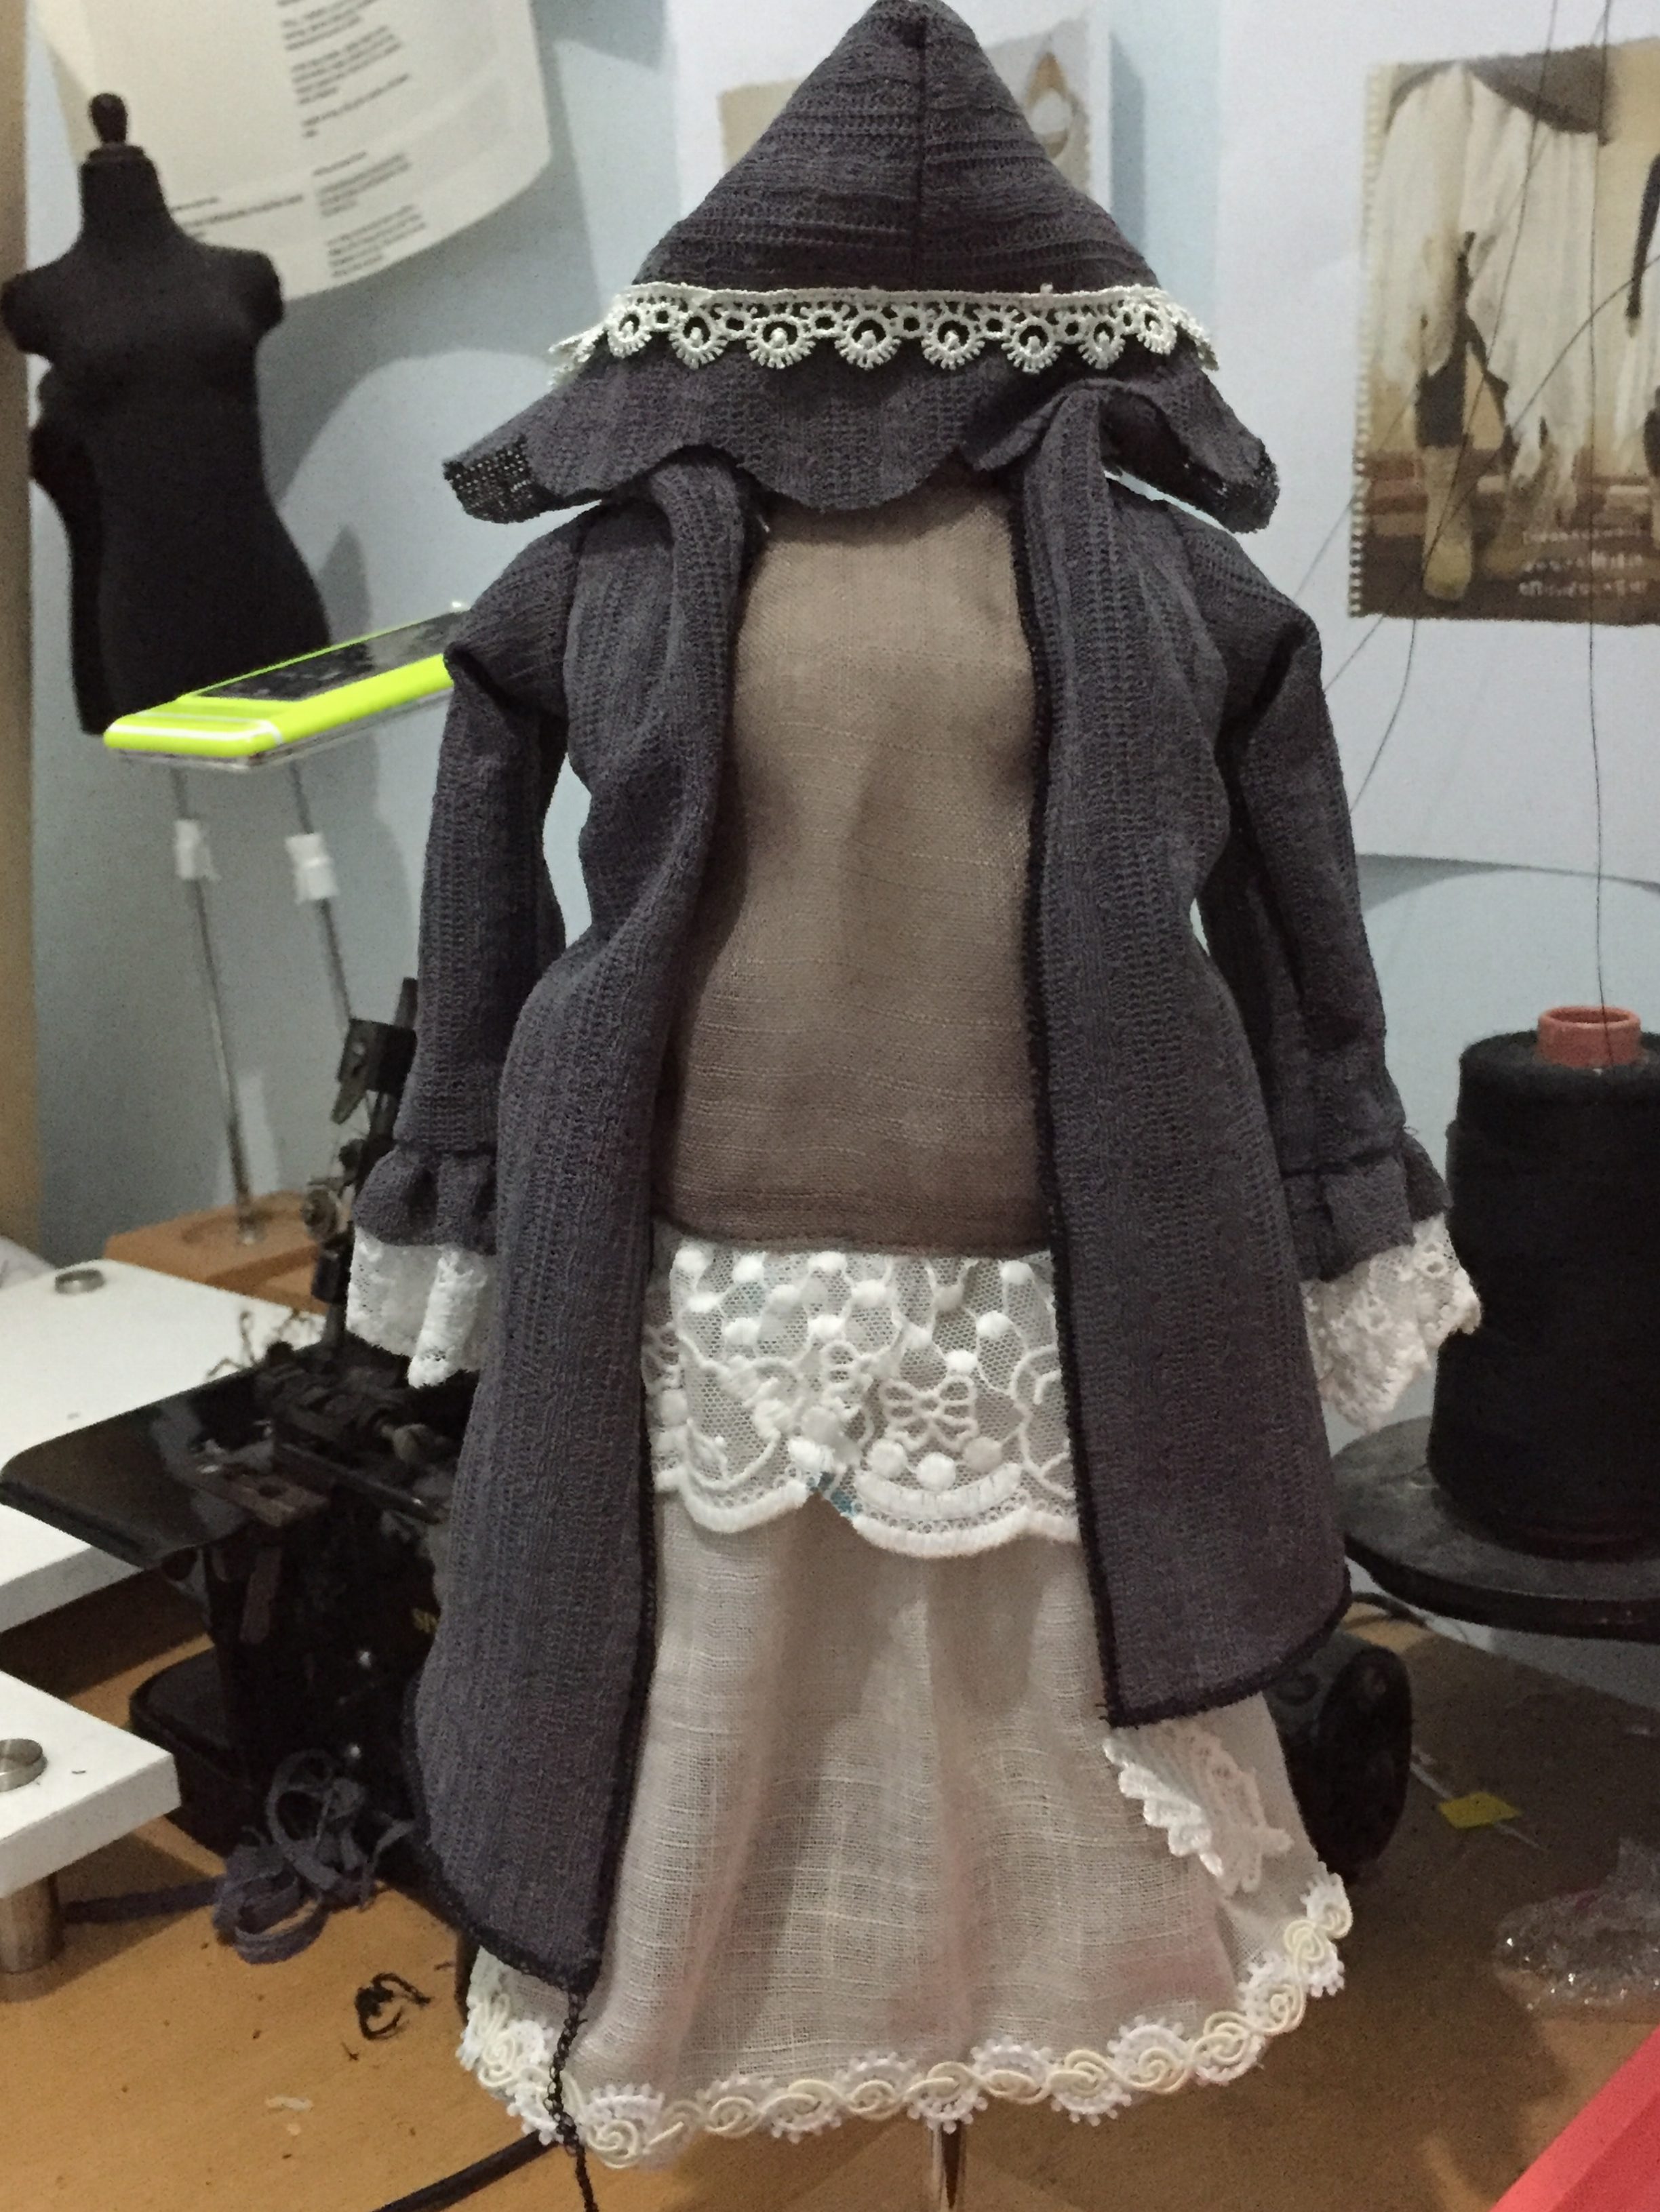
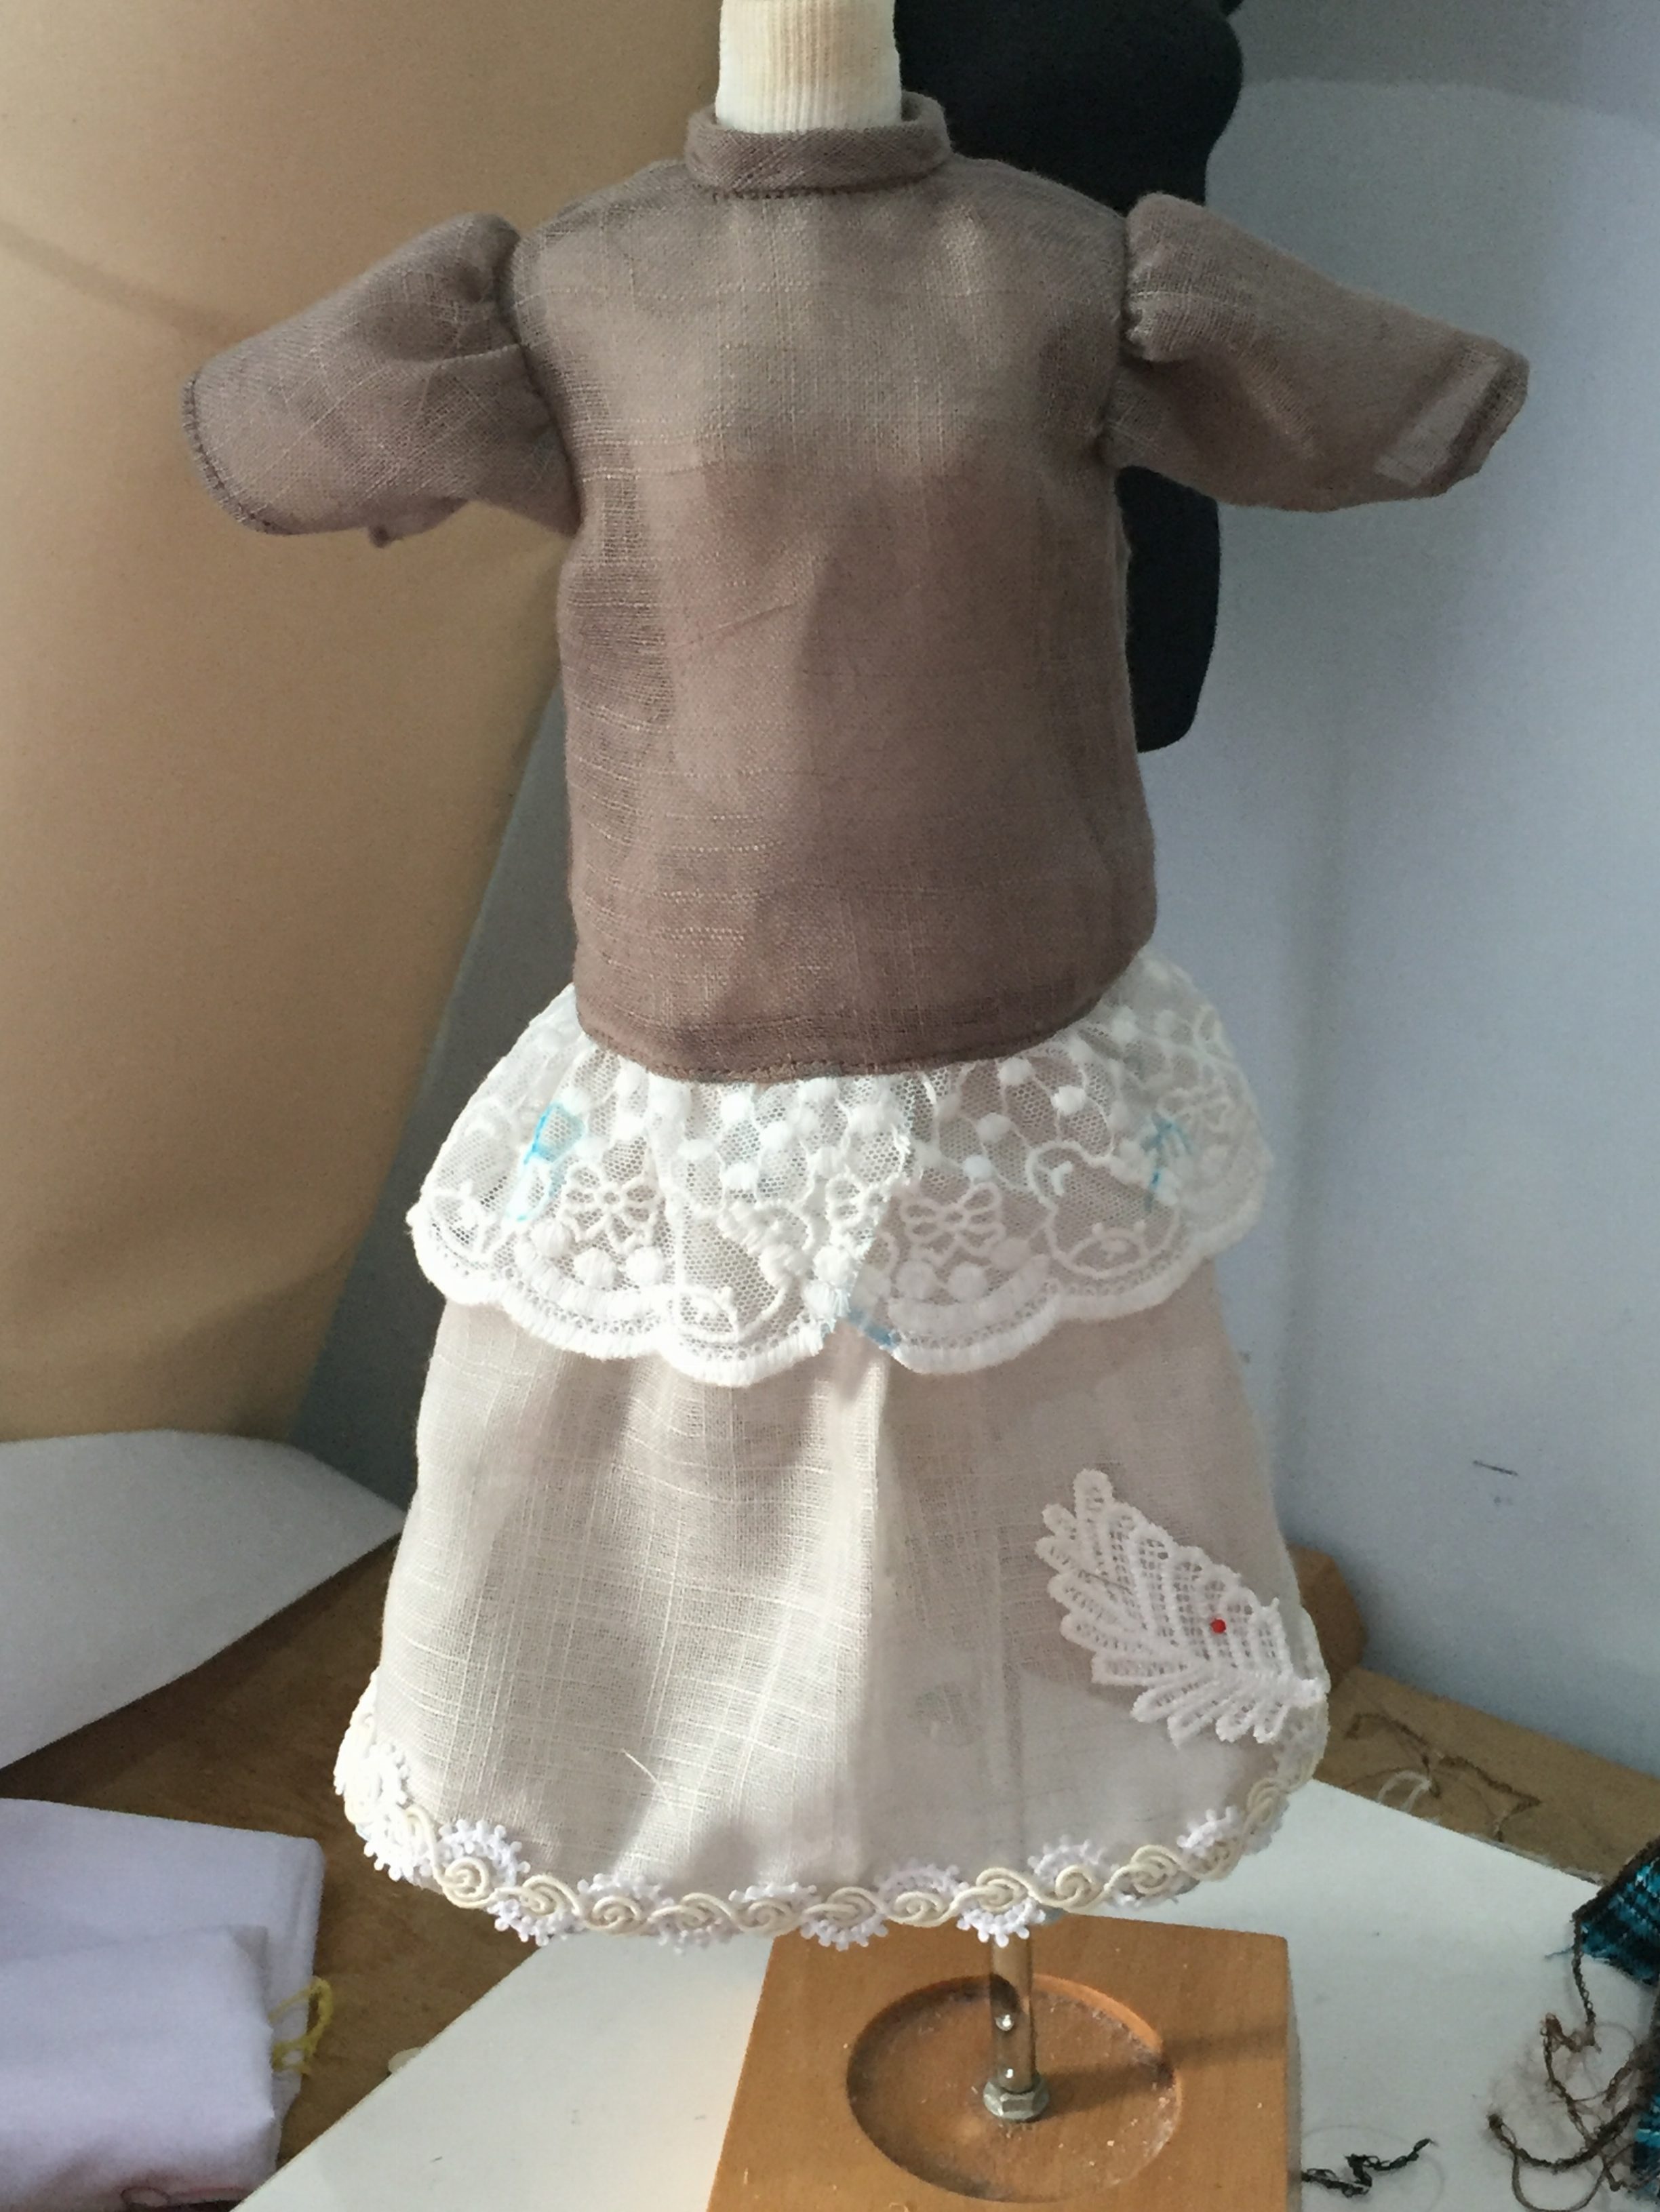
Do you see the pic before my write starts? Yes, A DOLL TORSO. Some people may use it to display clothes, to help when making doll clothes, etc. Yet, IS IT A VALID TOOL to represent a doll clothes? I will say, NO. Doll torso is a doll torso, we don’t know which exactly bjd size it is made. Is it eluts? is it volks? is it angellstudio? No, we don’t know. Even a clothes may look good when displayed on a doll torso, it doesn’t mean, it will look good when is put on doll body, and vice versa.

I, personally, use doll torso to help me sewing doll clothes (like to mark few things, to try arranging some decoration on clothes, and so on) and to give a rough look before I finish sewing and put it on real doll for real fitting. Yet, when it looks bad on doll torso, I don’t really take it seriously unless, it looks really really bad and not convincing, then I’ll take out my doll body even the sewing process is still half way. Using REAL doll to do quality control before my product is presented is a MUST. Even if it’s just for my own doll, not for sale, FITTING ON A REAL DOLL IS A MUST.

I asked the wig stylist whether she tried the wig she sent to me on a doll head because i know what is a wig stand. It has no face. So we don’t know where the nose is. We know, the nose is ‘dividing’ our face into two. It’s in the middle (normally). Wig stand has no eyes. The eyes of the doll, they are the ‘border’ of left and right face area that shouldn’t be covered by hair, unless it is the style; Even if it is, then the eyes position is important, too. Wig stand ball is not the same as doll head. The position of the top centre is different from real doll. The top centre of the doll head which will also be used as another control when putting a wig on it. Wig stand ball size as well as (again) shape are not as same as doll head. Even one doll head at one line of size can be differ in shape and size (8-9 inch, the doll head can be 8,8,5,9 inch). From what i see, it looks smaller (because it’s for display, it shouldn’t be ruin elasticity of the wig fabric). Using real doll is better as its size and shape are much more exact to ‘hold’ the wig fabric so it wouldn’t turn around when is being styled. Yet, even if someone still want to style wig on a wig stand, it is highly recommended to use real doll head for quality control because aside of shape and size, it has nose, eyes, and ‘exact’ top centre of the head. I think, when it comes to sell, someone has to make a sacrifice; use the available head to be used as quality control or buy a cheaper head but still at one line of size. We know there are few brands that sell less expensive than the other.

Our product may look the best or slightly best on different doll sometimes. That’s why, sometimes, we have to specific based on what doll size and BRAND (for exactly) we make this product. We can add warning that it may fit on other doll brand at same size line but can’t guarantee the same look and good fitting.

We can buy doll torso and wig stand, but we must have real doll if we want to sell doll items and use the doll for last quality control, even if it’s just head accessories or necklace. Believe me, it’s DIFFERENT.

Practising Before Making

I’m having a Doll clothes project that will need some particular details that looks ‘easy’ to be done but actually not easy. Just because something looks simple, it means it’s easy to be done. It’s not.

Before I start my project, I had been practicing to make small pleat.

  1. I used varied ways, start from using particular sewing feet up to regular sewing feet. I ended up  making it in ‘manual’ way, using regular feet, mark the fabric using ruler, and pleat-sew it using sewing machine.
  2. I found that some fabrics are not good for creating small pleats like this. Small and ‘close’ pleat for exactly.
    1. Using thin and paper-feel linen fabric is the best but we can’t always use this fabric for our any project, like my current project.
    2. I found a very good fabric with colour I needed but the price is a big NO. I think, the store was a bit thrifty. The fabric was like ‘abandoned’ but they didn’t want to give more discount. Good quality one yes, but I am not sure either it’s kind of colour that will sold out quickly. The length is also too short for man clothes but the colour is rarely used for woman clothes. It’s also slightly dust-dirty as well (and i don’t know whether it can be washed or not). So, yes, NO buy.
    3. I used another fabric, brand TOYOBO. It’s cotton. the thickness is good for my project, it’s slightly thicker than i need but it’s ok. The texture is good. The price is good, too.
    4. There are several fabrics that actually i can use, too but again, sometimes, we can’t compromise with the design and the whole look we want to see.
    5. The problem that should be underlined is that when making pleats like this, we can feel, the fabric ‘becomes’  slightly stretchable. That’s why, I said before, the linen on no.1 is very good, because I didn’t feel the stretch too much. Yet, again, back to number 4.
  3. It’s difficult to make a consistent pleat width
    1. I used ruler to help at first but then I did another way.
    2. I fold the fabric and try to fold as same width as previous pleat and then sew it. The previous pleat position is not ‘opened’; if it faces to the left, then let it be. It is to make me keep focusing on the width pleat i’m sewing. I found it’s more difficult to do it when I change the previous pleat direction or open the previous pleat while sewing the current pleat. I’m always distracted and can’t sew it consistently.
  4. I used small stitch size and try to sew about 1mm or may be slightly less than that from the edge/folding. I didn’t sew current-pleats ‘under’ previous-pleat. I don’t know, I feel like the feel of the fabric becomes ‘thicker’ and not like i want. Feel like I’m making ‘accordion’. I really don’t know how to explain it in detail but the point is I just feel it doesn’t become what I want it to be if I didn’t sew it like that (^_^)”. If you think, you prefer to sew the current-pleats ‘under’ previous-pleats a.k.a the stitch is under the previous-pleats, then do it. No-restriction in this case (^_<). You can of course have your own R&D, too!
  5. If you see the pictures above, I haven’t reached what i can call consistency. Even so, it’s the best so far I can get and quite good progress compared to many failures (^_^)”. I still want to do 1-2 practice on ‘real’ project before real-real project is made. Haha. You know what? in real-real project, i only need 2-maximum 4 close pleats actually. Yet, i practice more than 4 pleats in ‘every practice-batch’ because I want to get used to the technique I think it’s the best for me.

I can sewing like this in easy way and fast but the result will not as good as i want it to be. Besides, actually, sewing will be easy and fast if I practice hard and harder. First important is to practice while analysing the BEST way to do it and then keep practicing the best way I find. The more I’m getting used to, the faster i can sew well

It would be different if I sew like a mess and keep sewing like a mess and get used to it. The habit and skill that i will get is skill to sew like a mess.

So, let’s not be lazy and keep practicing a GOOD sewing.

R&D : Sewing Ribbon on Collar

In current project, I am going to R&D sewing ribbon on collar. It is quite challenging for me because the curve side make it difficult for ribbon to follow when is being sewn.

I forgot from where I got the idea but here I am using FABRIC GLUE to attach the ribbon on. It is under process. I have not known if the pen marker can be washed. I have not know if it’s better to sew it. It is a very raw idea under process. I will write more about this later.

The first step was just glue the ribbon then iron it to make the ribbon stay. Do it gradually. Apply glue then iron, apply again and iron again until we finish. It may need some practice to make it perfect.

Posted in R&D

Mori Kei : A New Love

I watched Honey and Clover dorama once again  last time. My eyes were then on Hagu’s outfit. It’s so adorable. The style looks so messy but very comforting. I looked in the internet and it’s mori style. I remember i have read about that mori means forest, and the outfit is about forest-style fashion, yet, I hadn’t paid attention until I watched again Honey and Clover. I also found about the guide of Mori-kei fashion (and life). After reading it, I googled the mori style clothes. I printed them, too, and put it on my sewing room wall so i could remember well the style. The style is ‘totally’ new to me (my feel). It’s not sexy. It’s not ‘cute’. The cuteness is totally different from what I have always done. After some reading and watching, I tried designing some ‘simple’ mori kei clothes and then sew it for my doll. It’s not easy, I must be very careful as using different other than guidance color will create a non mori style feel. Using wrong lace will create a different feel.

These are some work in progress pictures.

So, not yet washed, ironed, button added, etc etc. I totally hate to explain this but some people really don’t know what the WIP is and throw harsh and stupid comments.

The robe is slightly ‘stiff’ because I used lining in purpose. The green one is a linen and the lining is a thin interfacing. I want to give a different color from main fabric lining because I want the lining to be seen as well as give a feel of ‘flowing’ to the whole colours of the other outfit. From what I have watched, mori kei robes were mostly  from light fabric and very ‘flowing’. So, it may be different feel we have when see the robe here.


I even did a short r&d for this skirt. I locked the fibre using kind of stitch in my sewing machine. it locked very well (^_^)d. It’s not the basic zigzag stitches by the way. Try other stitches that looks like arrow or else on your machine.

I used french-seam on the fraying-skirt part. As for the dusty-pink skirt, i used serge technique for finishing.


This is the first mori style. I used a stretched textured fabric for the robe. It’s challenging too. I didn’t use lining.

I also made another robe but didn’t take the picture. It used cotton with lining so how the look-feel looked like the green linen robe above which was not too flowing and a bit stiff. It is a bit stiff because it’s doll size. The fabrics themselves are actually thin ones.


I think, i still want to do something with the blouse lace. It’s an overlapped on the front but somehow not quite seen. Not yet get a good and fixed idea until now. I might also leave it as it is.

I gathered the lace long time ago using special  sewing feet. I’m glad that the result doesn’t have too high density. If it does, the bear pattern would be seen

I sew the leaf on the skirt using sewing machine, following the ‘bone’ shape of the leaf. It’s quite challenging. The fabric was better than I thought. I thought it would be a messy sewing but not. The back/wrong side is good, too. I used burning/hot knife technique on this skirt.

I’m still influenced by my sewing style that is in-order, balance, ‘neat’ while in mori kei, it’s totally different. So, sometimes, it’s already ok but I still have that feel to fix here and there and add something while actually it might not be needed after all. Putting pictures on the wall is quite helpful to keep reminding myself on track.

I still call my ‘current’ mori kei sewing is ‘pure’ style. In the future, i might combine mori kei with my own style.


Outside of The (Comfort) Box

I’ve been doing sewing with cute and/or sexy style. Pink, red, white, yellow, all ended up with cute or sexy style.

Lately, i watched a japanese dorama and I’m in love with one character and her clothes style. There’s no very much source about it though it’s a popular style. I feel I want to make that clothes style. It’s a total change. Colors, style, everything will be unusual for me to do this style. To be honest, I don’t even know if it can match my doll(s)’s character. Haha.

I will update everything here later

Changing Most Patterns of Doll Clothes

Been learning lots for months from dolly books which then remind me of how I used to take measurement for human patterns. Now, i’ve been going back to revise the pattern on few parts. My pattern for doll is ok but for some style, I think, the dolly books technique (which is same as when taking human measurement) is better for aesthetic reason.

Also, I’ve been wondering about changing sleeves pattern, too. Been R&D-ing but not sure about it. I took course lately, for a traditional clothes type (human size). While doing that, my teacher taught me her new technique in making pattern. It inspired me to do the changing for doll sleeve pattern, too.

Besides that, I’ve also been learning about collars from a book. A very good reference, indeed. It’s for human but I apply it for doll pattern, too. I also changed the way I placed the pattern on the fabric. I usually used my teacher’s theory but seems it can’t be applied to doll clothes making. *This also change my way to place some bag-parts patterns on fabric. It has  HUGE impact indeed.

I also tested some pants patterns. Comparing them between theories. I found that the patterns from my book was better than one that my teacher taught me. So, my latest doll patterns were already using that pattern while the older, not yet. I forgot to change my MSD Volks pants pattern until I realised why the fitting was not as good as expected. I was just, aaa, it still used my teacher’s theory. Haha. So, yess, I revised the pants pattern like crazy. Pants pattern is difficult yet the sewing itself is not too difficult.

I have lots of doll bodies. So, yes, it will be a quite lots of homework to revise here and there. Whew.

Sometimes, I just want to be like some people who are ignorant about this but I can’t. I always want to improve my skill and knowledge. It fulfil my thirst for a better result of my project. It’s handmade. I feel like, even if I don’t sell it, yet, I want to make it as best as I can so i can present it to potential buyer as a proper project to be bought at the price I’m given. But…may be, before that, i want to present it to myself as a proper and better product.

What about you? Are you trying to achieve better each time? Are you easily satisfied? Would you give your best (not just your whatever-effort) effort to your handmade? Or just ignorant, as long as it sells?

Desperate With Supplies And Material

I plan to make doll clothes for sale. I had hunted some good fabrics but apparently, they were the ugliest fabrics I ever bought.

I took a break and sew something else like bag. I then thought to make bag with faux leather handles. I bought the handles from local online store. I tried their strap handles 2 times and THEY WERE AWFUL! Broken after 1 time usage. Even let’s say, in my very worst laziest sewing, it never happened, the bag strap/handles is broken after ONE time usage. I don’t know. I WILL NEVER USE THEIR STRAP/HANDLE AGAIN. I was even planning to sell my bags with their handles in the future. Good thing, I only bought a few for sample. Goodness. It even still took quite lots of money, too.

I am so frustrated. Just when I want to upgrade my product with better designs and materials, the worst happened. All plans are cancelled automatically.

I’m now blank and don’t know what to do. I thought, I haven’t tried harder but seems the harder I try, the worse it becomes. *cry

Pattern Is OK But Why Is It Too Fit?

I made a doll pants pattern. I was confused, why the pants I made was almost unfit for my doll. It was almost too small. Need a little bit pull and small cuts to make it  flexible on the waist.

I then ‘tested’ the pattern (Yes, I created real project first and then tested the pattern when I found the problem). It was OK!. I was totally confused. The only thing different was KIND OF FABRIC. The fabric i used for testing the pattern was cotton, regular cotton which the fiber woven wasn’t too strong and quite flexible. While the real project used imported fabric which is strong and not thin aaaand not flexible either.

I was also thinking about sewing procedure. It also created a problem if I sew it not in a proper order but I thought I had fixed the problem but the pants still didn’t fit well. When I sew the test one, I used different order/procedure. I didn’t have to fix things.

The pattern technique I used has it’s own formula for small, regular, big style of pants. I used small style pants formula but after the problem arose, I made regular pants pattern. I will tested the pattern tomorrow. I must use the exact same fabric or same kind of fabric to test the pattern. Goodness, and I used branded expensive rare fabric for small style real project (T.T)… I must re-create using another typical fabric I have which has length more than 50cm. TAT …

I’m so disappointed at myself. Been making doll clothes lately and none is good. TAT … Perhaps because I made them with a very stressful mind (not caused by the making process but because of other things… 🙁 )

Will write about my findings and conclusion later after making the pants… TAT …
Continue reading

Rubber Band (Tape) With Holes

Above is the rubber band I mentioned in my previous post. It’s quite common now. Kids’ pants use it a lot.


Please zoom it to see it.

I learned from store pants I bought for kids while ago. The points are:

  1. Make a ‘vertical straight hole’ on the waist band. The height is same as the height/width of the rubber band. Use the ‘making-button-hole’ feature in your sewing machine. Make it 2 holes, right and left. Just estimate yourself how many cm from the middle front.
  2. Cut the rubber the length is from right hole-back waist- left hole  PLUS extra 5-8 cm. You don’t have to pull the rubber when measuring the length.
  3. Slip the rubber into one hole until it goes out on another hole.
  4. DONT FOLD THE WAIST BAND, YET.
  5. Sew the each end of rubber band on the waist band (the extra 5-8cm). I used zig-zag to attached it to the waist band. So, it would be about 5-8cm from the holes. It’s just ‘naturally’ attaching or holding the rubber to the waist band using stitch. Just sew with technique you think it’s neat and better and you can use any stitch you think better though. I set no rule here.
  6. THIS WILL BE THE INNER SIDE of the waist band.

Place a button UNDER the rubber; the position is between the end of the rubber and the hole on the waist you have made on picture no.2. Yes, somewhere under 5-8 cm extra length of rubber
You can place button before inserting the rubber though. Do whatever you feel easier for you to do.

Then, to wear the pants, don’t forget to slip the button into the rubber hole (unless, it fits already or using belt. (^_^) )


The pics are dark since i used notebook camera (T.T) but i hope my notes helps, too. The last pic shows the gathers created by the stretched rubber. The gathers are not a lot because I didn’t really make the waist too big. If I sew the darts and not adding the waist part, it could be fit for my boys. Yet, my boys’ body is hip-less (or waist-less? (^_^)” ), so, it would be better to add belt stripes or using rubber like this. (>_<). I was too lazy to make belt stripes and also, i don’t buy my boys belts. hahaha. I like this rubber (rubber with hole for exactly) style. Well, I can’t say this pants style/design is very formal but sufficient for any occasion for kids. Also, if the rubber has depreciated and not too stretchy anymore, we can still adjust the waist part buy pulling the rubber and hold it with button.


*There is another technique to make pants with rubber more formal style. It’s quite ‘difficult’ though. I think, i post the video here long time ago. Not my video. It’s from youtube. I don’t use the technique here as I don’t want to make formal pants, instead, just a.s.a.p pants.

Boy’s Uniform

I made boy clothes lately. School ‘free’ uniforms, and now, pants. It’s not easy to make them the right way. Of course, it looks ok but actually, there were small mistakes and ‘imperfection’. It’s quite tricky to sew this kind of ‘seamless’ pattern on the opener side. I also forgot that my teachers once taught me wasn’t correct. I forgot to correct that when cutting the fabric. Well, it’s wearable alright but definitely not ‘correctly’ sew.

I made pants too. Three pants then the last one is the best! Haha. Seems like the pattern I got from my teacher is kind of ‘regular’ shape of pants which is it is really difficult for me to change it into more fit style. May be i can change but it would take lots of trial. I don’t have time! After modifying the pants ONCE, i decided to use another pattern I got from my sewing bible. It is the best! Somehow the formula seems weird but really it works! Looks like the writer is really an expert and have lots lots lots experience. I have never seen something like this before. *I can’t reveal the formula. Please get your own book. The writer’s name is WANCIK. It’s not in english though. So may be, it can’t be used internationally 🙁 . I don’t even know if the publisher republishes it again. I haven’t seen it in a while in bookstore. May be some people spread it in internet. I  don’t do that. I don’t want to get in trouble with the law.* 

My boys leg shape from waist to feet, they are thin. So bony TAT. It’s hard to make quite fit pants. The pants I made are still a bit lose on the leg but ok on the waist. I used stretch on the waist, too but if i didn’t use it, it was ok too. I used type of stretch band which has holes so we can control the length of stretch by slipping the button into one of the holes. It’s a very good idea about using this kind of stretch for kids pants as they will growl and the stretch quality usually depreciates along with time. Yet, for ‘neat’ and very formal pants, I won’t use this. Haha. Although, it won’t be seen from outside, I don’t feel it’s 100% neat. Must take a pic and show the stretch band/tape someday and put it here. It may be difficult to imagine what kind of stretch or what kind of rubber i’m talking about.


There is also a web i would like to promote. They sell downloadable patterns. I don’t use their pattern though as i can make it myself and love to do it, yet, for some people who don’t like making pattern and just want to sew, you might want to check out https://fitinline.com/product/pattern/ (this is not in english either but may be since it’s diagram, it’s more understandable)