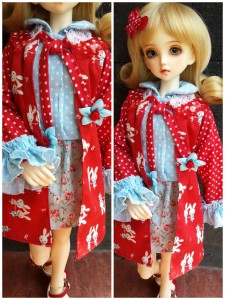
YoSD Size Project

20140707_14543220140707_134452

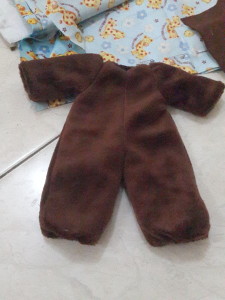
front

20140707_13395920140707_133939#1

back                                                                     lining

*I think, you might have to set the monitor light at maximum because the fabric is pretty dark and my camera didn’t capture the detail clearly.

I must take a note here for myself about where to sew first.

1. Middle Front and Back. Back is sew only about 1/3, left 2/3 for the opening.

2. Put Front and Back part on the CROTCH part. Leave the side un-sew yet.

3. Sew shoulders B and F together.

4. Repeat for the lining.

5. Sew together the main fabric and lining on the leg-holes part.

6. Sew together the neck line, main and lining.

7. Sew the sleeves, each main and lining.

8. Sew the lining side up to the bottom of the sleeves.

9. Pull the fabrics, main and lining out of the hole of the middle back-opening.

10. Sew the side of main fabric up to the bottom of the sleeves.

11. Repeat for the other side.

12. Sew together the middle back of main fabric and lining.

a. one side is sewn by hand. Fold inside and sew by hand.

b. one side is serged. Don’t need to fold inside. To make it easier to be serged, we can stitch it together or sew it together first and then serge it on top of the seam.


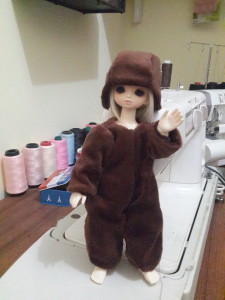
I can make it easier or sew it easier but here in my project, my goal is to attach the lining as neat as possible (‘main fabric seam’ is less seen). The fitting isn’t the main concern here but the shape is. I was aiming to make a ‘clown’ or ‘bear’ costume shape. It’s pretty basic pattern i made here, yet, from here, i wish to have time to develop the pattern into many cute style for YoSD size.

The size I made is for Asleep Eidolon size. Somehow, this size is the best since it’s a pretty ‘all-size’ YoSD size. I mean, i can use this size for Aidolls, Volks, and Momocolor. And because of the nature of the ‘figure-shape’ of the aidolls, the pattern turned out to be the best look on Aidolls. Isn’t that great?

I’m so happy with the result. I wish to have more time to develop this today but well…other priority must be served.

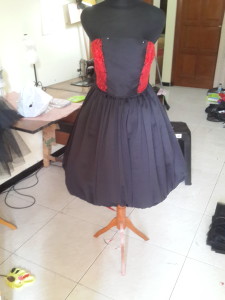
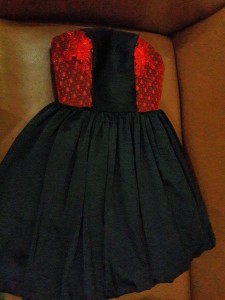
Balloon Dress, some notes

20140627_160507


2014-06-28 21.03.29


After making 2 balloon dresses, i conclude:

1. Better use regular zipper than invisible zipper. Especially when on the waist part, there’s gathers. Gathers make thickness which will make zipper difficult to pass. Even if it can, the look is ugly. Better to use regular zipper and sew it neatly.

2. Add 1 cm when there’s gathers on the waist part. Add up to 1.5cm 2cm when there’s separate underskirt included.

3. Balloon skirt is best when i put frills layers between the main fabric and lining. So, it’s like filling in between the fabric. AND, i think, that’s why it’s called balloon dress. (^O^). Like a balloon, we need to fill it in with air while in case of skirt, we need to fill it with frills layers to make it bloom (^_<)

Frill Lace Appliques, A Thought

2013-11-04 14.58.03


PhotoGrid_1383550701978


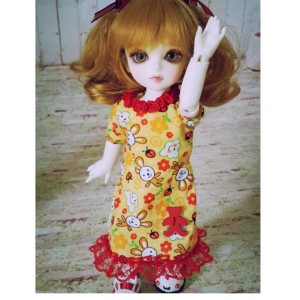
It’s been frilly lacey doll outfit since….forever? Haha. Some people make it beautifully yet a few others in my opinion just make it without a thought. Seems like the idea is giving lace and frill etc as many as possible and it would look good.

These are just some thoughts of mine:

1. Sometimes we dont have to use lots of frill and laces. Just use it sufficiently. Too many frill lace can bias the ‘theme’ of the outfit itself. It’s like the outfit is loosing itself. Unless, it’s themeless. haha.

2. Choose the lace as well as fabric for frill. Not all kind of clothes need the same  lace and frills and not all lace and  frills are suitable with the every design we make. Color, frill pattern or design, and size should enhance the whole design as well as the fabric of the clothes.

3. Don’t push it. If the frill and lace just ruins the whole look, just leave it.

4. Frill, laces, and applique can save ‘our sewing’ quality, yet, don’t depend on it. Sometimes, if our sewing is bad, it will look bad unless we put frill lace or appliqué  like a mummy bandage.

5. We can use some ‘unusual’ style of color of frill, lace, and applique but it will be better if we use colors that the pattern in the fabric has the same color. It needs a feeling to choose the color that looks good. Yet, sometimes, we just want to play with the colors and it may invite ‘critics’. I did that and I DON’T CARE. Some matched colors are so boring. So, try some color combination and pick the best (as well as adventurous) look. Present something new, offer a trend, rather than following common picks.

Off topic: My trends are sometimes duuuh or weird. My style is simple but sometimes, it’s not the ‘era’ to present that but I really don’t care. Really, years after that, people are starting to create that while I did that years ago. It’s a good thing if we can sew and have our own unique taste. It doesn’t have to be a heavy unique taste. Just know yourself, know your style, be comfortable with it.

Doll clothes are pretty when it comes with frill and lace (and applique) but if your style isn’t like that, don’t push it. Even so, sometimes, we want to decorate our ‘simple’ clothes. Do it but don’t go overboard. We don’t want to kill the design. Make sure that decoration will enhance our clothes not killing it. Sometimes, I saw some clothes with lots of frill and laces, and I just,”what are you trying to say with that clothes?” The story of the clothes has gone. UNLESS, you want to make that kind of clothes intentionally.

It’s just a thought from me about choosing and using frill,lace, and applique. It’s not for debated or argued. You may always choose whatever you like. I or your friends may not like it but it’s your choice in ‘frill and applique choosing’. If you’re comfortable with your picks, then go for it. My post here is just to give an idea as well as tips about using frill, lace, and applique on doll clothes and doll clothes itself.

Not all frilly and full of laces doll clothes are beautiful. Not all non frilly and laced  doll clothes are boring.

Ultra Cute Clothes Set

pic20130817132054

There are lots of things i learned from this project. Starting from revising old basic pattern up to serging. The result isn’t too satisfying yet it’s ok for me as i am not selling it.

I will write sewing notes abt it when i have more time. Been so hectic lately.


Hats: Searching my original pattern

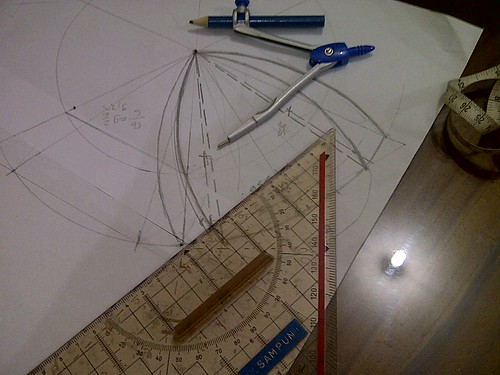
Hat...it's pretty math. XD


I’m making my own original pattern of hat. It’s simply because  I want to be free of being dependent  to others people pattern. I want to know how it is make so I know how to modify it into many style in the future.

It’s pretty math here. haha I was pretty good in geometry back then…hahaha. So, i applied it a little bit.

How did I make it?

IT IS A SECRET. (^u^)…

Yet, I read my japanese hat books today. I want to refresh myself about the finishing technique. I noticed that making a hat is a bit ‘drappery’ thing. No such a basic pattern like clothes. It’s so different. There IS a ‘basic’ pattern but it’s not like clothes. I mean, not much calculation etch to make it. Only 2 measurement that we need: the round head length and the length from ear to ear. Not really complicated, yet, at the same time, the pattern is ‘free’. I mean, we can make it as we want and it still works!

That pic is actually not my first pattern. It’s my second one (i have the 3rd one…haha). The first one? it worked. The 3rd? It worked as well. I can’t say it’s a failure…it’s just  different shape but both are succeed patterns.

The key of hat shaping is (so far I notice) on the ‘curve’ of the parts/slices. (I’ve revealed small secret here (^.<)). We can play with that. We can create a hat based on that and then cut the hat here and there and voila! We get a new pattern with ‘abstract’ slices shape. I haven’t tried it though but I think, It will work, too.